Making Your Own App Registration for Microsoft Graph
Some companies may prefer making their own app registration rather than authorizing Syncovery as a third party application. This page describes how to register and authorize Syncovery in the Azure Portal for use with the Graph protocol. You will assign permissions on the application level, and Syncovery will not need user accounts to connect to your Sharepoint or M365 site.
Be sure to read our more generic page about Synchronization, Migration and Backup of Sharepoint Sites and OneDrive before deciding to register your own app.
Step 1: Decide Between User or Application Based Authentication
Syncovery can use the Graph API either in user mode or application mode. In user mode, each user needs to authorize Syncovery on their machines individually, and Syncovery will inherit the user’s rights. Depending on whether you will use application permissions or user permissions, the steps to register the app will differ slightly.
Step 2: Registering the App
Go to the App Registrations page in Azure Portal:
https://portal.azure.com/#view/Microsoft_AAD_RegisteredApps/ApplicationsListBlade
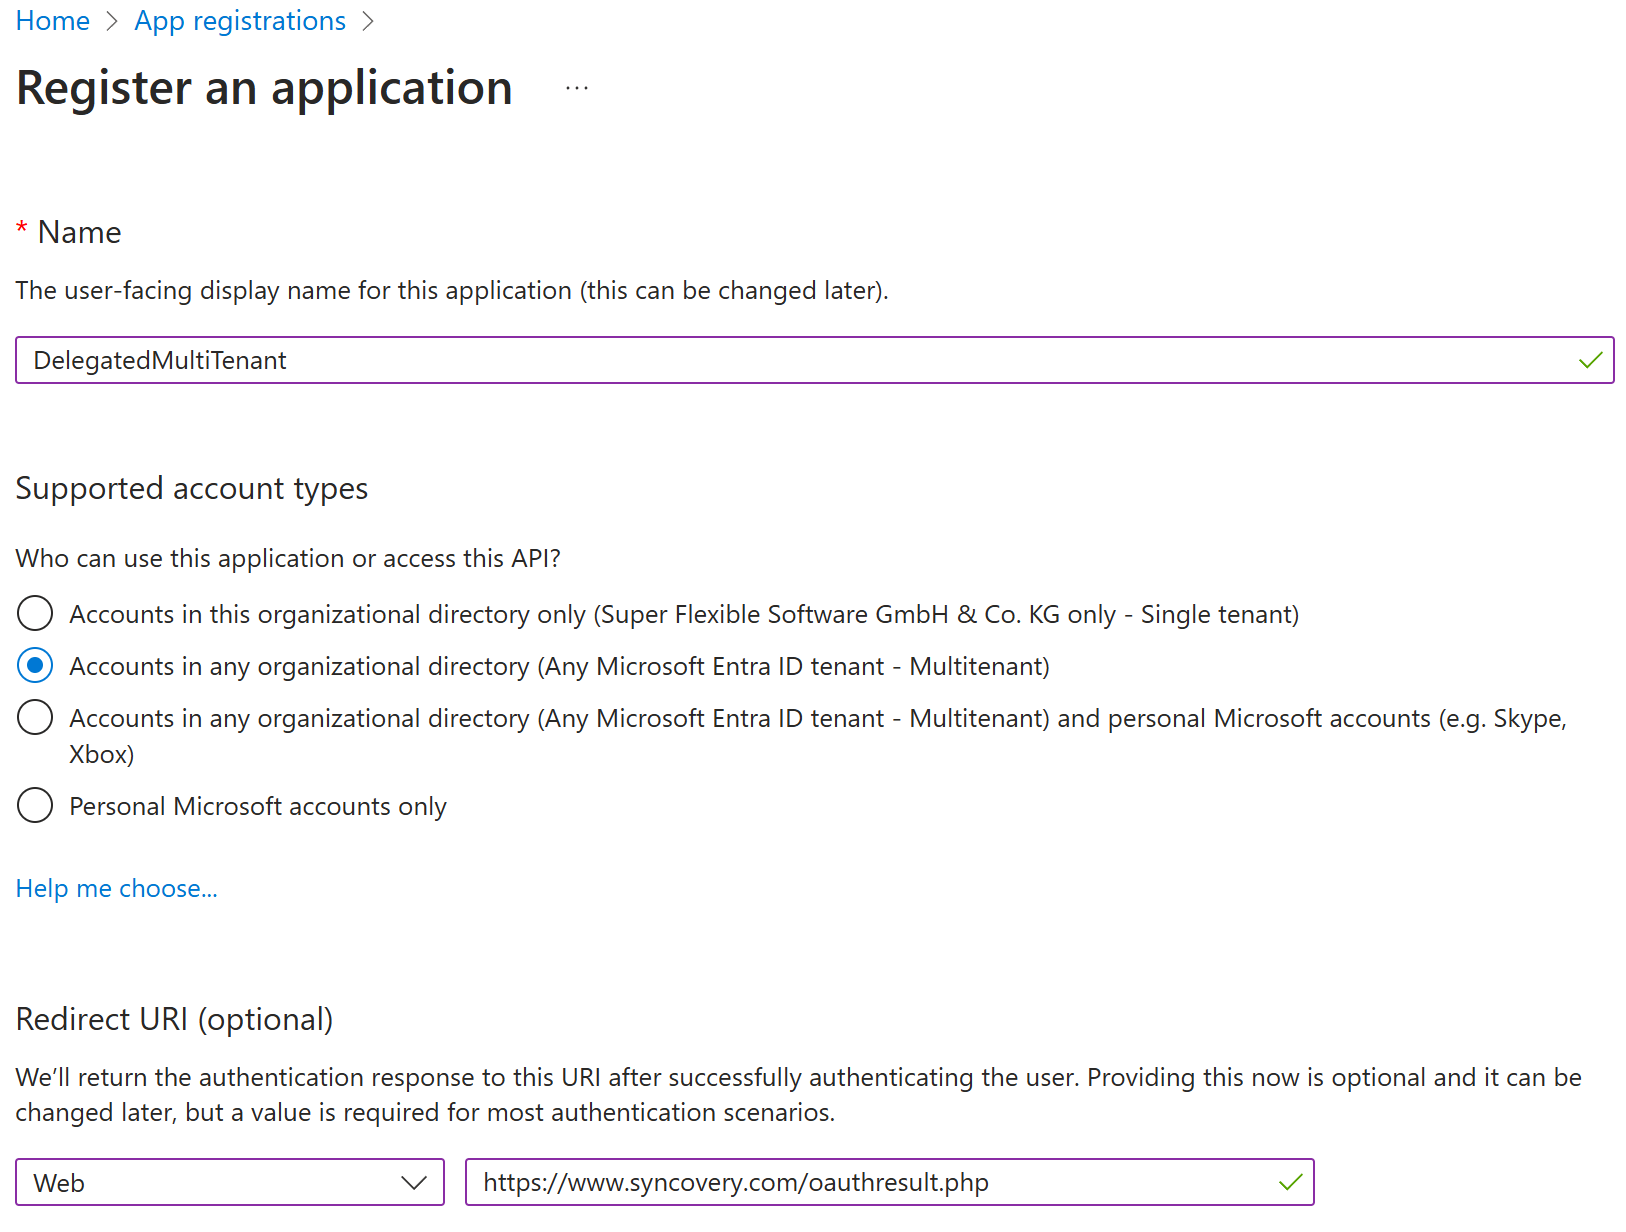
Click on “+ New Registration” and specify a name for the app.
Use these settings for user-based authentication:
- Account type: choose the second radio button (multitenant)
- Redirect URI: https://www.syncovery.com/oauthresult.php
Use these settings for application authentication:
- Account type: choose the first radio button (single tenant)
- No Redirect URI is Needed
Please see this screenshot as an example:

Step 3: Creating a Secret for the App
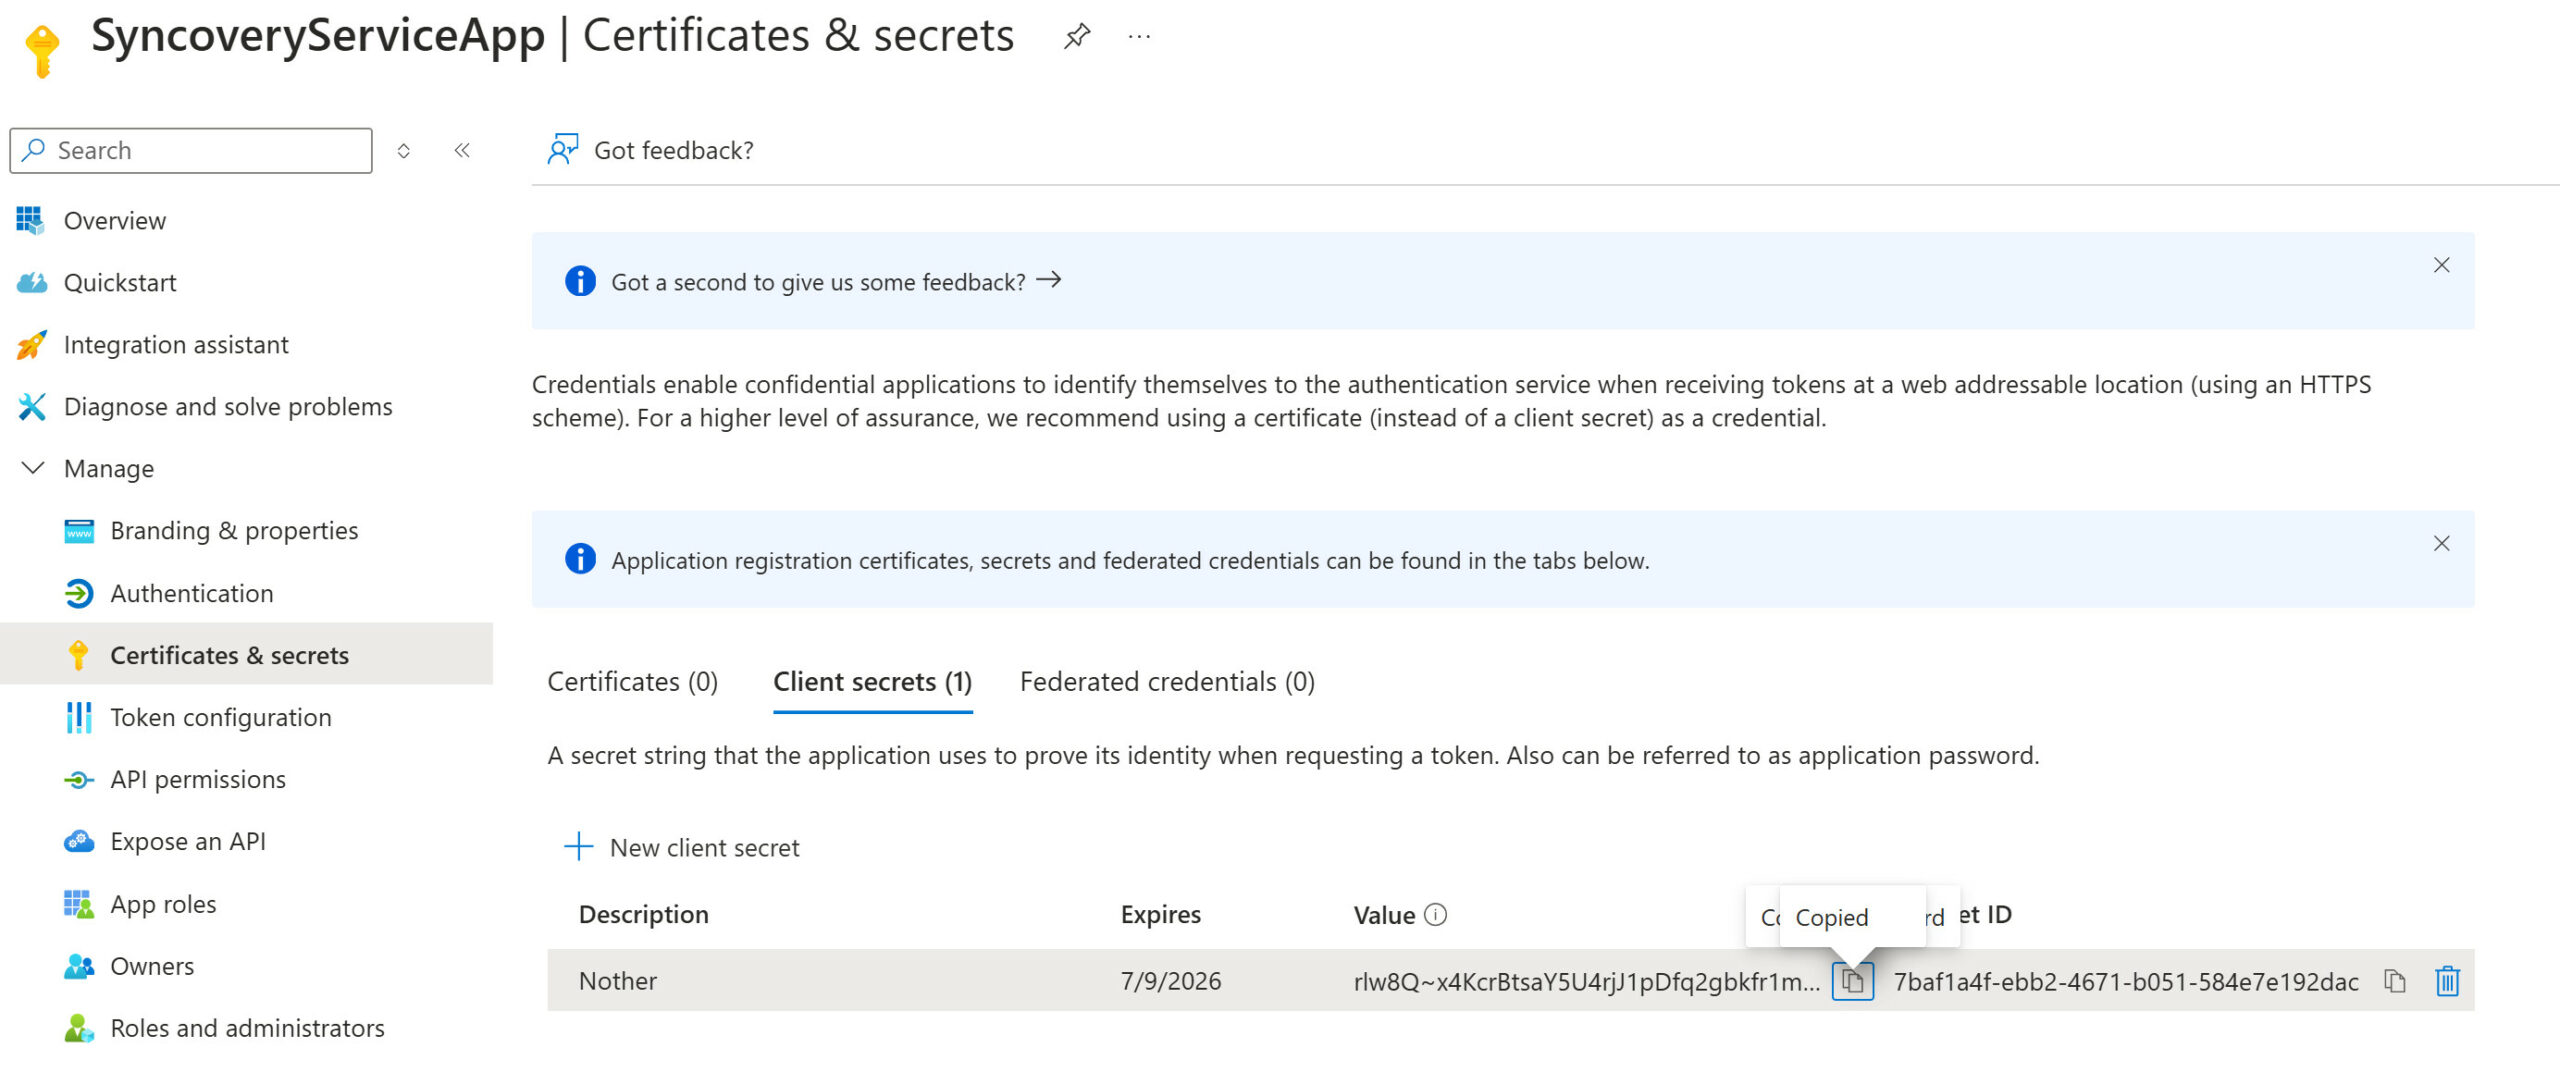
Next, please click on the App ID and head over to “Certificates & secrets” and create a new client secret. Note that secrets have an expiry date and need to be replaced when they expire. You need to copy the “Value” of the secret over to Syncovery, but not the secret ID. Here’s a screenshot of how the created secret is shown in the Azure Portal:

Step 4: Permissions
If you decided to employ user-based authentication, there is nothing to do in this step. The permission scopes for user-based authentication are called “delegated permissions” and they do not need to be configured in the Azure portal.
Only when using Syncovery with application level authorization, you need to add some permissions for the Graph API and grant them to Syncovery. The screenshot shows the permissions required for normal operation, though more restrictive permissions may be possible (see separate documentation for Sites.Selected).
Make sure you add “Application Permissions” for the Graph API, not “Delegated Permissions”.

Step 5: Adding the App Details to Vault.ini
If you look at Syncovery’s Vault.ini, you will find separate sections for each cloud connection. Here’s how your new section would look like when you add the app details of your own registered app. Note that this INI section is entitled graph_service. Graph is the protocol, and service is the optional account ID that you can enter on the Internet Protocol Settings dialog. So you can actually use something other than “service”.
Please note that the line “SERVICEAPP=1” is only added if the app is authorized on an application level. If you want to let each user authorize Syncovery separately, please do not include this line, as it prevents the interactive OAuth2 process.

The secret must be added to Vault.ini in unencrypted form, but Syncovery will replace this line with an encrypted form of the secret when the first connection is made with a Syncovery profile.
Step 6: Creating the Syncovery Profile
You can now proceed to create the Syncovery profile as usual. On the cloud side, click the Internet button and choose the Graph protocol. Enter the optional Account ID used for the name of the INI section in Vault.ini (see above). Click the upper Browse button to choose the Sharepoint library, and the lower Browse button to choose a folder.
