Introduction to Peer to Peer File Transfer
Peer-to-peer file transfer is a powerful solution for sharing and syncing data directly between two devices without relying on a cloud service. In this guide, we’ll walk you through setting up an SFTP server on one end, configuring your firewall and router to allow seamless communication, and using Syncovery to manage the file transfers. Whether you’re looking to sync files, create backups, or simply transfer data securely, this step-by-step guide will help you configure everything from start to finish, ensuring smooth and secure file transfers between your systems.
First Steps
The steps outlined in this guide assume you will be transferring data, or performing a folder comparison or synchronization between two Windows PCs over the Internet. If you are synchronizing within a LAN or VPN, it will be much simpler, since you don’t need to configure your router. But most of the steps shown below can be useful for synchronization with a LAN too – particular if you don’t want to use traditional Windows network shares (SMB).
The first step is to decide which PC will host the SFTP server and which will run the main Syncovery program. The SFTP server runs in the background and has only a minimal GUI, while Syncovery on the other PC will be used to set up profiles/jobs to perform folder comparisons, backups and synchronizations.
Installing and Configuring the SFTP Server
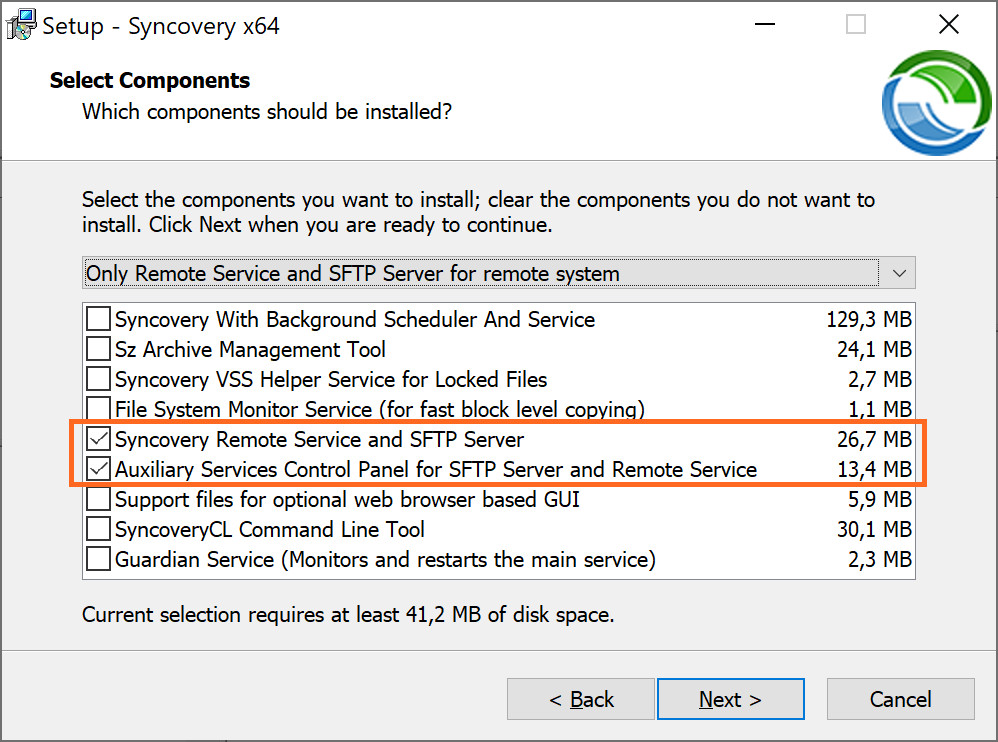
Download the latest version of Syncovery 11 from your Download Page. Run the Setup program on the PC that will act as the server. Be sure to include the two setup choices shown in the screenshot below:
When the software installation is complete, start the Syncovery Auxiliary Services Control Panel by typing “Aux” in the Windows Start Menu search field:

Next, we will configure the Syncovery Remote Service, which helps us generate folder listings fast. Just type the paths you want to work with on the third tab sheet as shown below:

Now it’s time to set up the SFTP Server feature. Choose the checkmark Activate Syncovery SFTP Server and click “Add” to add users:
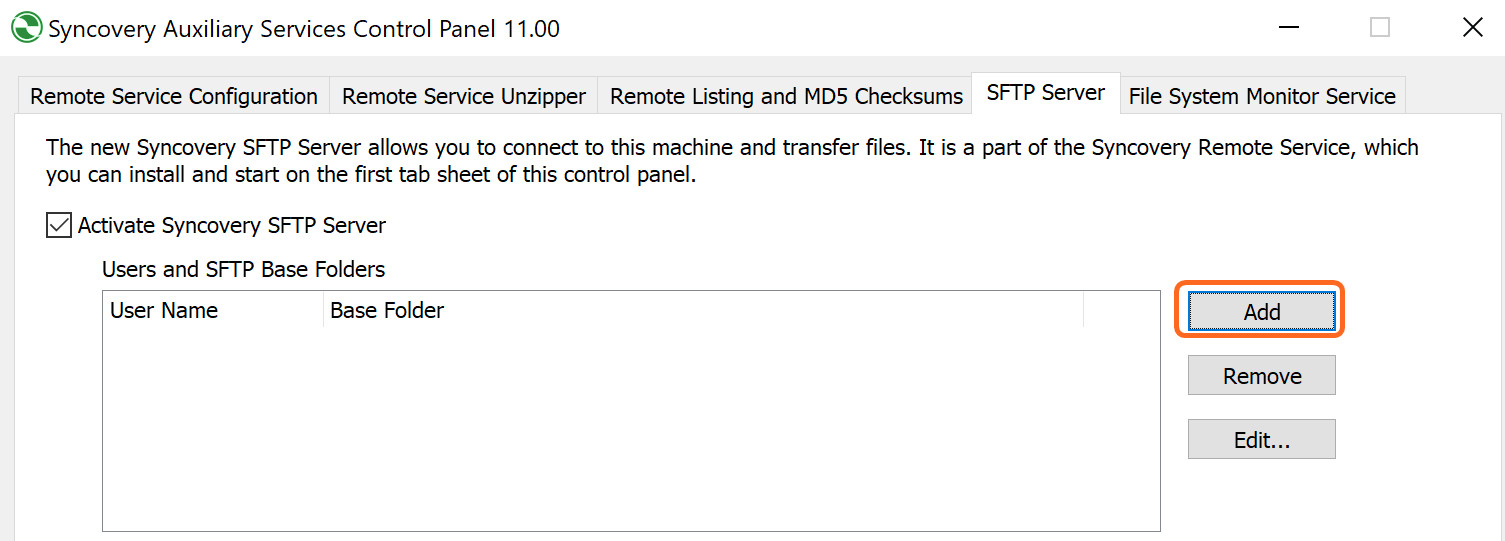
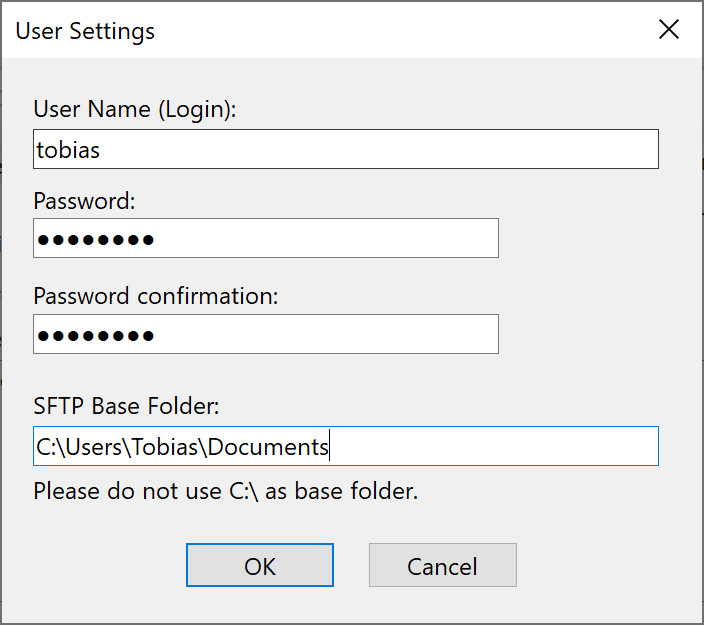
You need to set up at least one user account. The account must be given a strong password, including numbers, letters, and special characters. It should be at least twelve characters long. Remember that your server can be reached over the Internet. Some other people might be going to attempt to log in, too, and we really need to make sure they can’t get in. If you don’t need the permanent availability for peer to peer transfer, you may even want to stop the SFTP server when not needed.
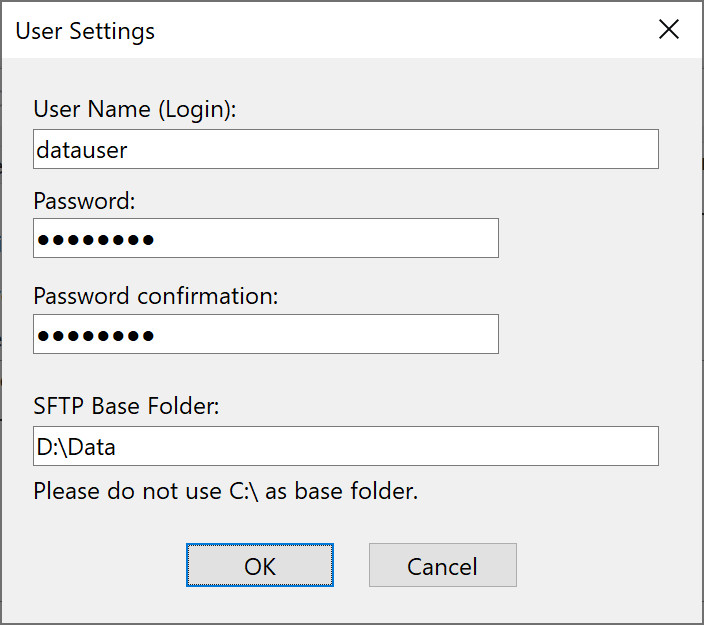
If you have folders on different drives, you need a separate user for each drive. In addition, you should not use C:\ as the SFTP base folder for a user, so that can also be a reason you need more than one user. Here’s two examples:
Finalizing the SFTP Server Setup
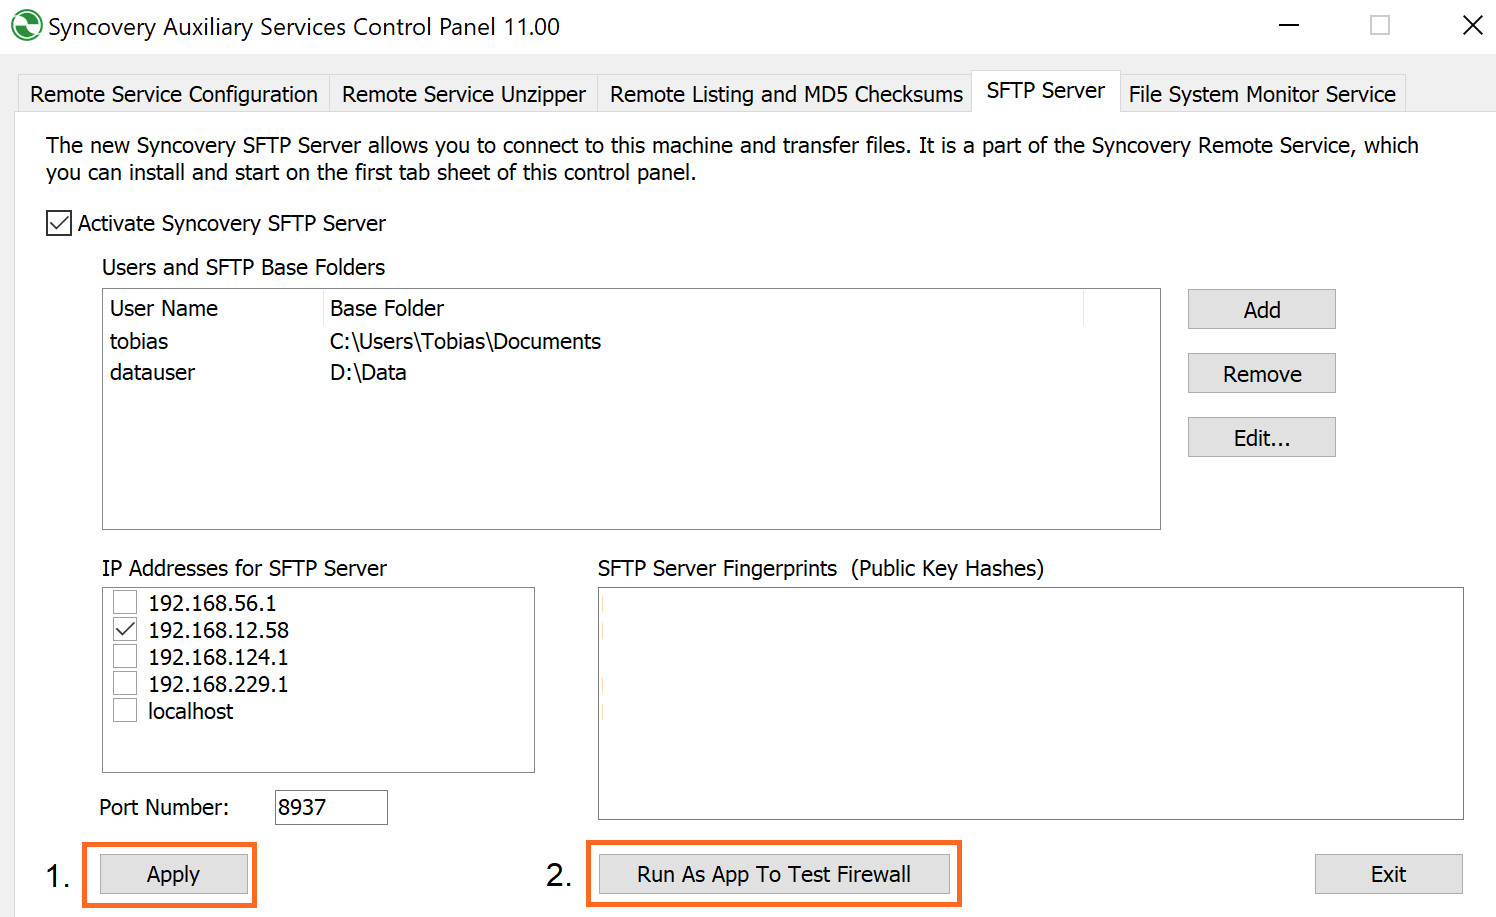
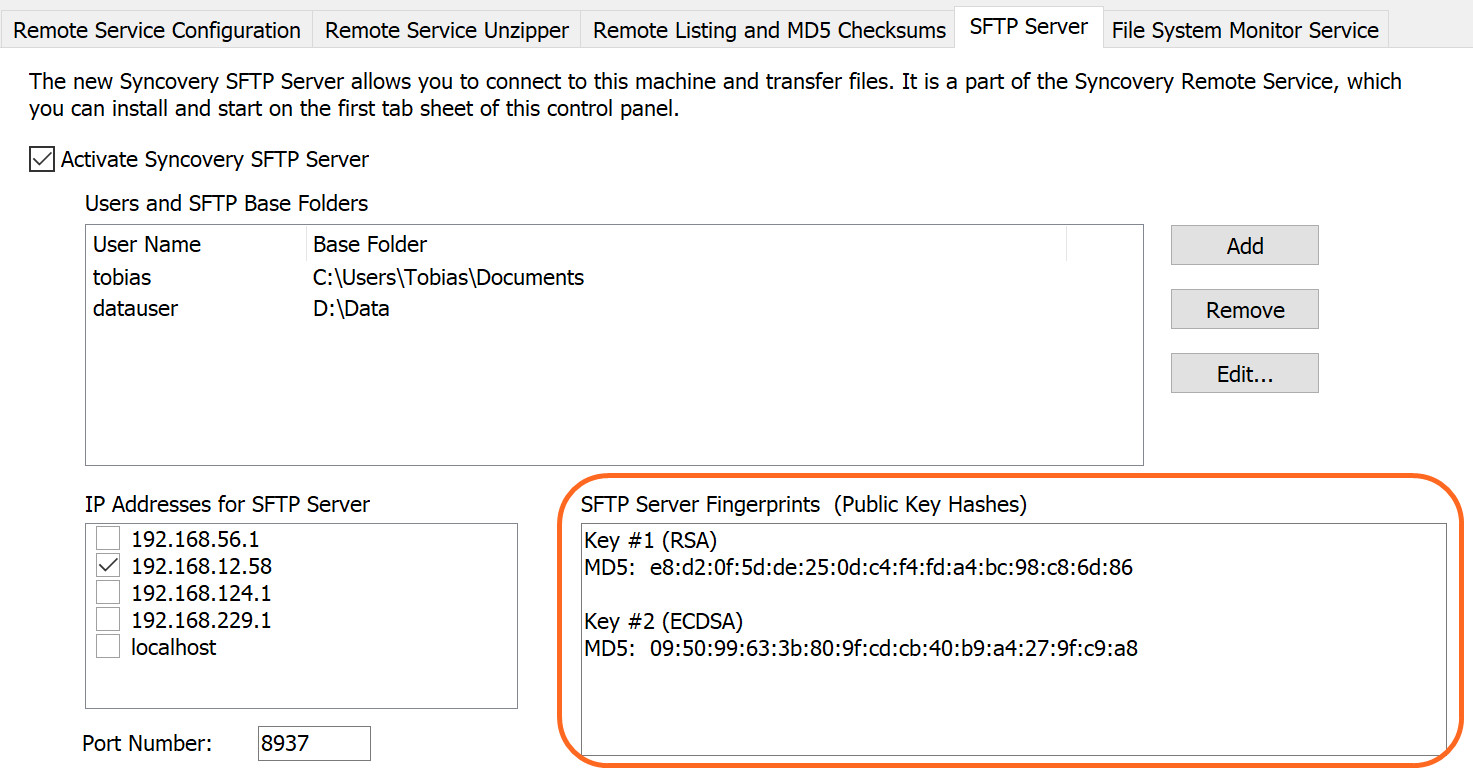
The SFTP Server tab sheet will now look like the following screenshot. Please choose the IP address of the LAN adapter that connects your PC to the Internet. Note the port number, which can be changed. The standard SFTP port is actually 22, but we do not want to use that for security reasons. Click the Apply button, and then “Run As App To Test Firewall”. This button will do a test run of the SFTP server in a command prompt window, hopefully triggering a prompt from the Windows Firewall, which will allow you to let the SFTP server to be accessed from outside.
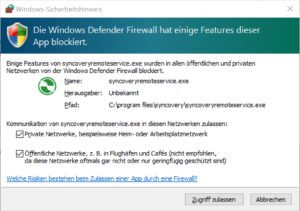
If you get a Firewall prompt like the following, please confirm it. If not, we may have to set up a Firewall rule manually. In either case, please close the command prompt window that you see.
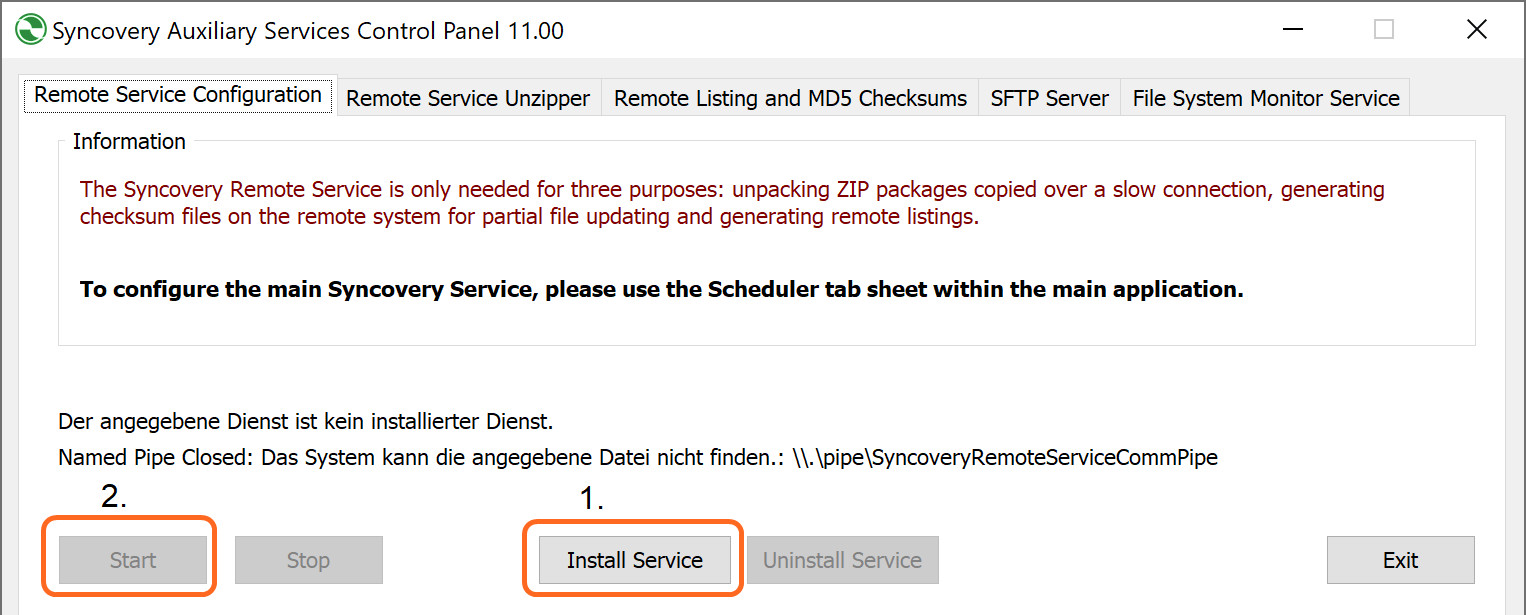
Next, you can install and start the Syncovery Remote Service, which includes the SFTP Server. Make sure that the testing command prompt window is closed.
Setting up a Firewall Rule
If you didn’t get a Firewall prompt, or if you later find out that the Firewall is still blocking the SFTP Server port, you can set up a rule by opening the Windows Firewall settings according to the following screenshots. Type “Fire” into the Windows Start Menu search field to get to the Firewall settings:

Click on Inbound Rules to the left and on New Rule… under Actions on the right side of the window:

A wizard will ask you some questions about the rule. First, make sure you create a rule for a Port:

Second, specify the port number. If you kept Syncovery’s default SFTP port, it’s 8937:

Next, please choose Allow the connection:

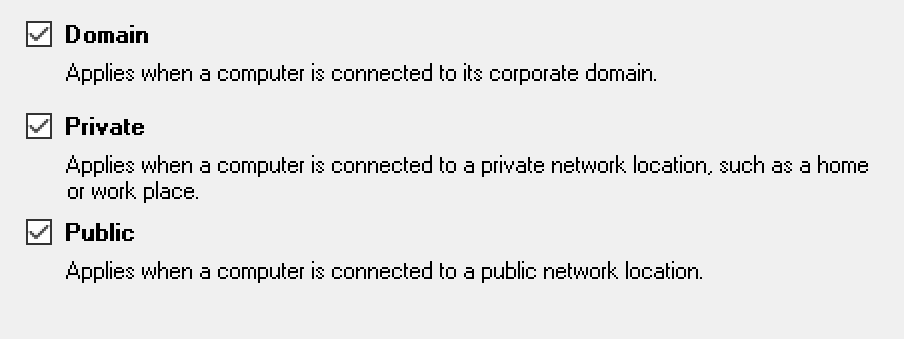
You can safely keep all the next choices chosen, as shown in the following screenshot:
Finally, give the new Firewall rule a name, for example:

Setting up Port Forwarding in your Internet Router
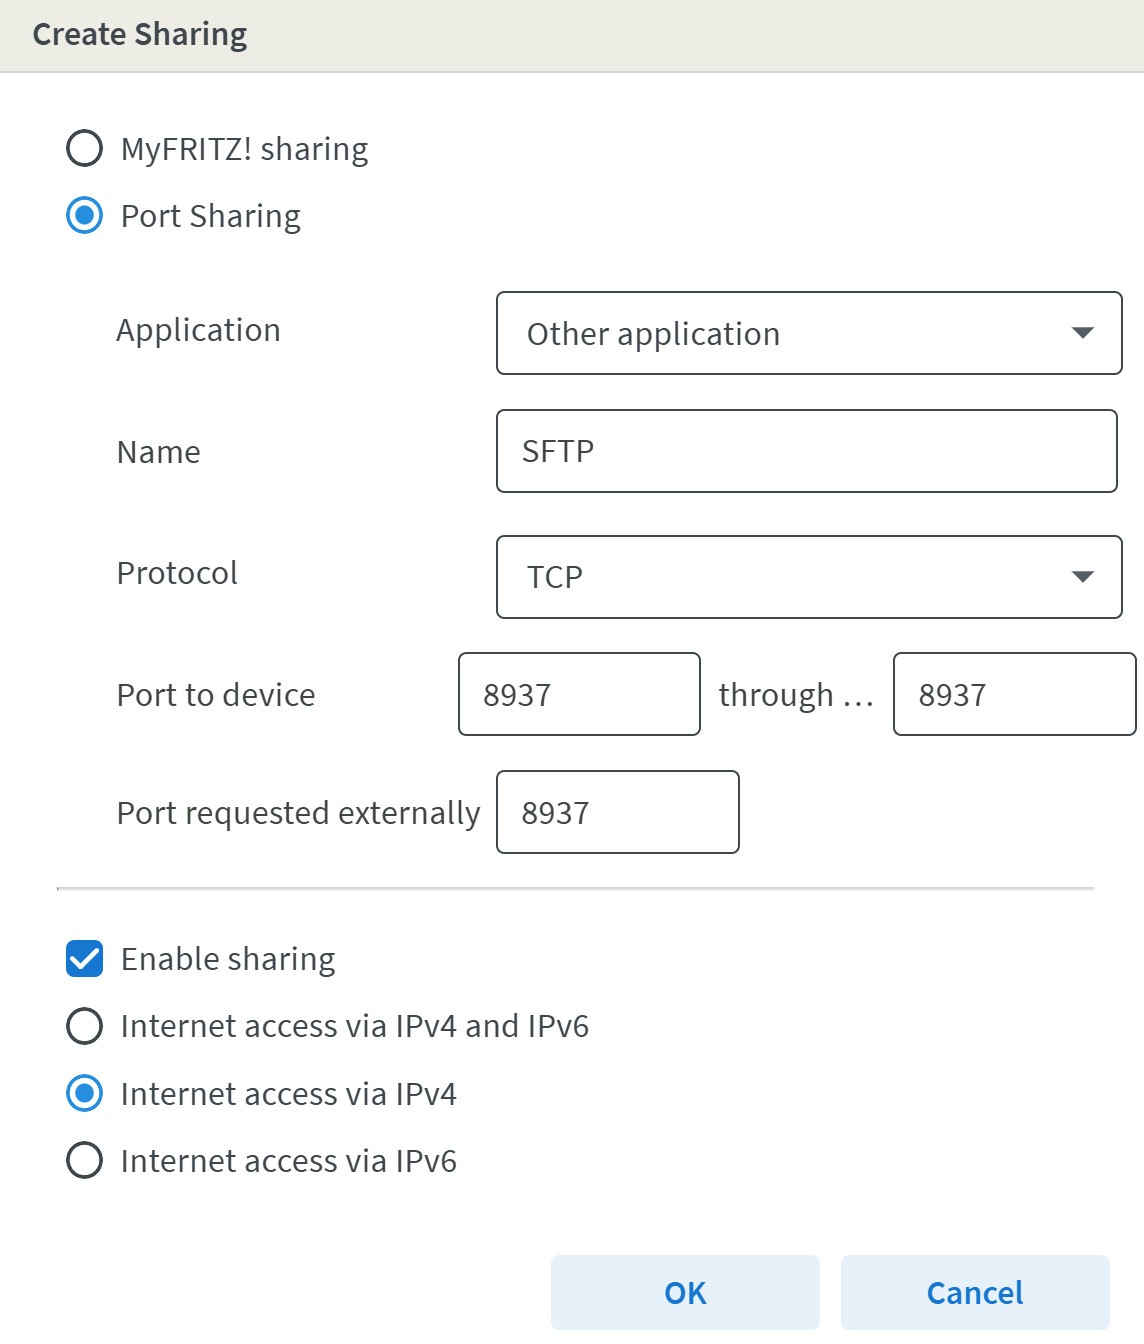
To make sure that incoming requests from Syncovery on the other PC can reach the SFTP Server, we need to configure your Internet Router to forward the connection attempts to the PC where the SFTP Server is running. The relevant configuration pages in the router might be called “Internet -> Permit Access”, “Port Sharing”, or “Port Forwarding”. You may need to select the PC from a list of connected devices, or type its IP address in the LAN, and then specify the port you want to use. Only do this if you specified a sufficiently complex password for all SFTP users, as documented above!
An example port forwarding screenshot is shown below:
Creating the Syncovery Profile and Verifying the SFTP Server Fingerprint
It’s now time to take one final look at the Auxiliary Services Control Panel. If you click on the SFTP Server tab sheet once more, you will now see the SFTP Server Fingerprints. By comparing these fingerprints when Syncovery makes the connection, you can ensure that you are connecting to the correct SFTP Server and that there is no man in the middle attack. The dialog box with fingerprints looks as follows:
Finding out the server’s public IP address
Since we are going to connect to your SFTP server over the Internet, we need to know the IP address or domain name under which your router connects to the Internet. If the router has Dynamic DNS features, you can use a domain name that resolves to your IP address. Alternatively, you can visit a page such as www.syncovery.com/myip.php from the PC where the SFTP server runs to find out the IP address.
Creating the Syncovery profile
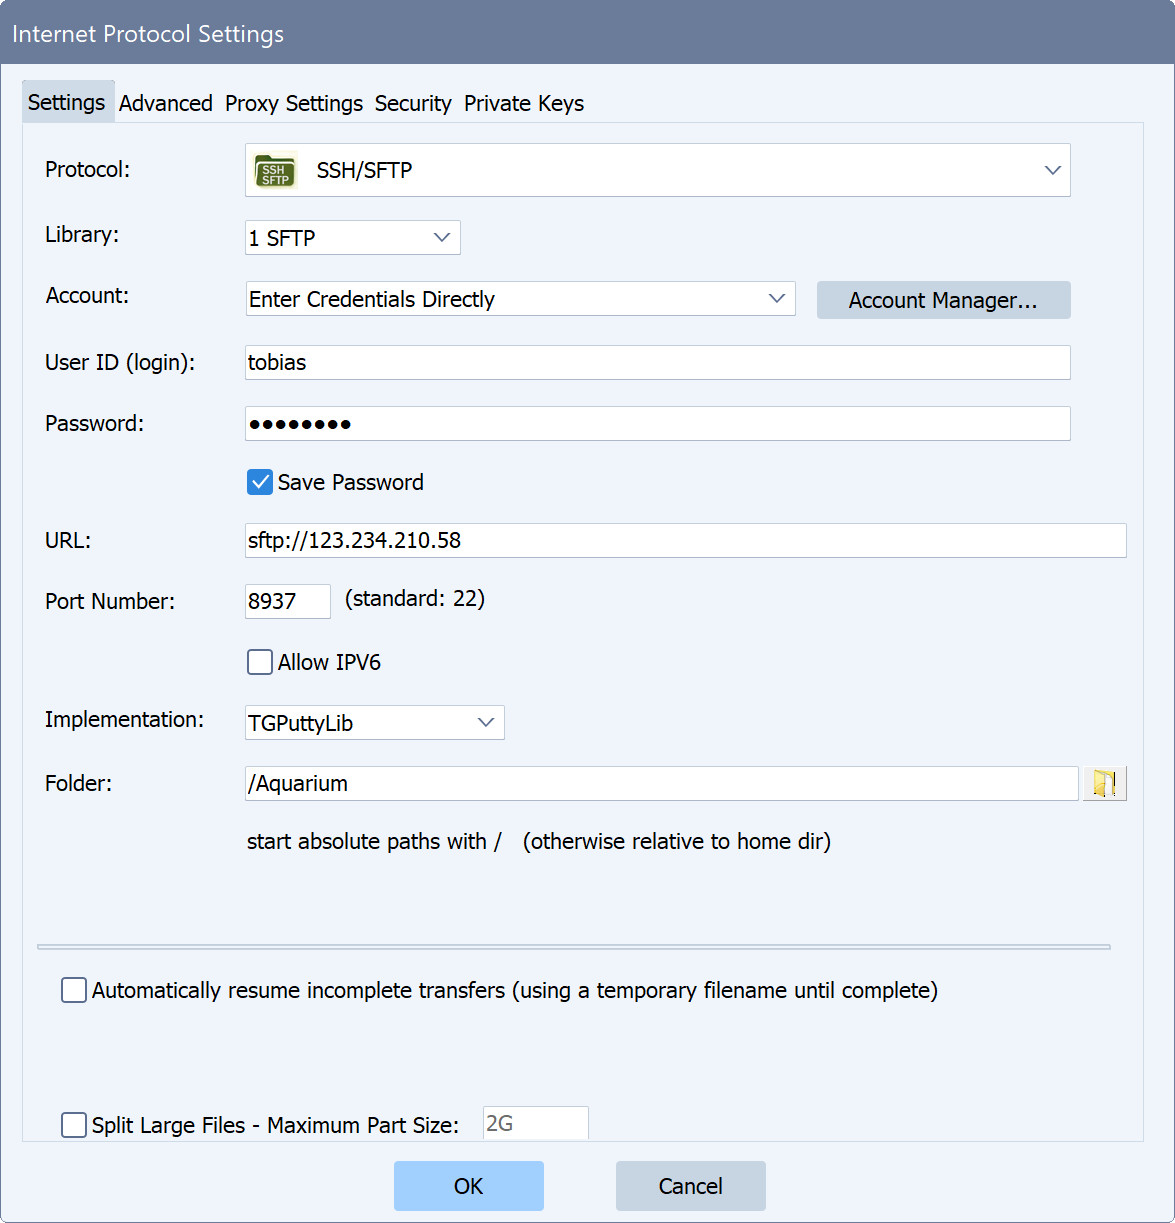
Finally, you can go to the other PC and create your Syncovery profile (or job). Choose a local folder on one side, and click the Internet button on the other. Choose the protocol SSH/SFTP. The Internet Protocol Settings dialog can be completed like the following. Remember to put the other router’s public IP address or dynamic DNS name in the URL field:
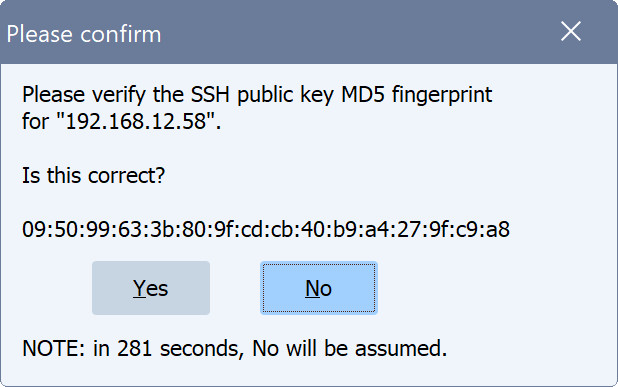
When the first connection is made, Syncovery will show a prompt asking you to confirm the SFTP server’s fingerprint. Please verify it against the fingerprints shown by the server to ensure that your peer to peer connection will be safe.
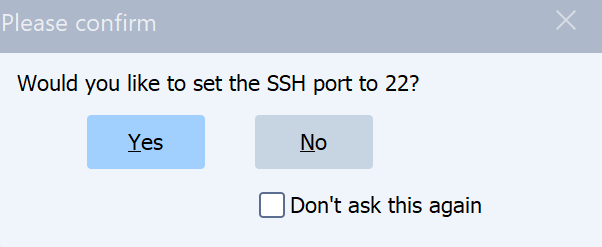
When you click OK, Syncovery may ask you if you want to change the port to 22 (the SFTP default). Make sure you don’t let it change the port! We really want to avoid using the default port number, as it is prone to continuous hacking attempts.
Major Syncovery Profile Settings
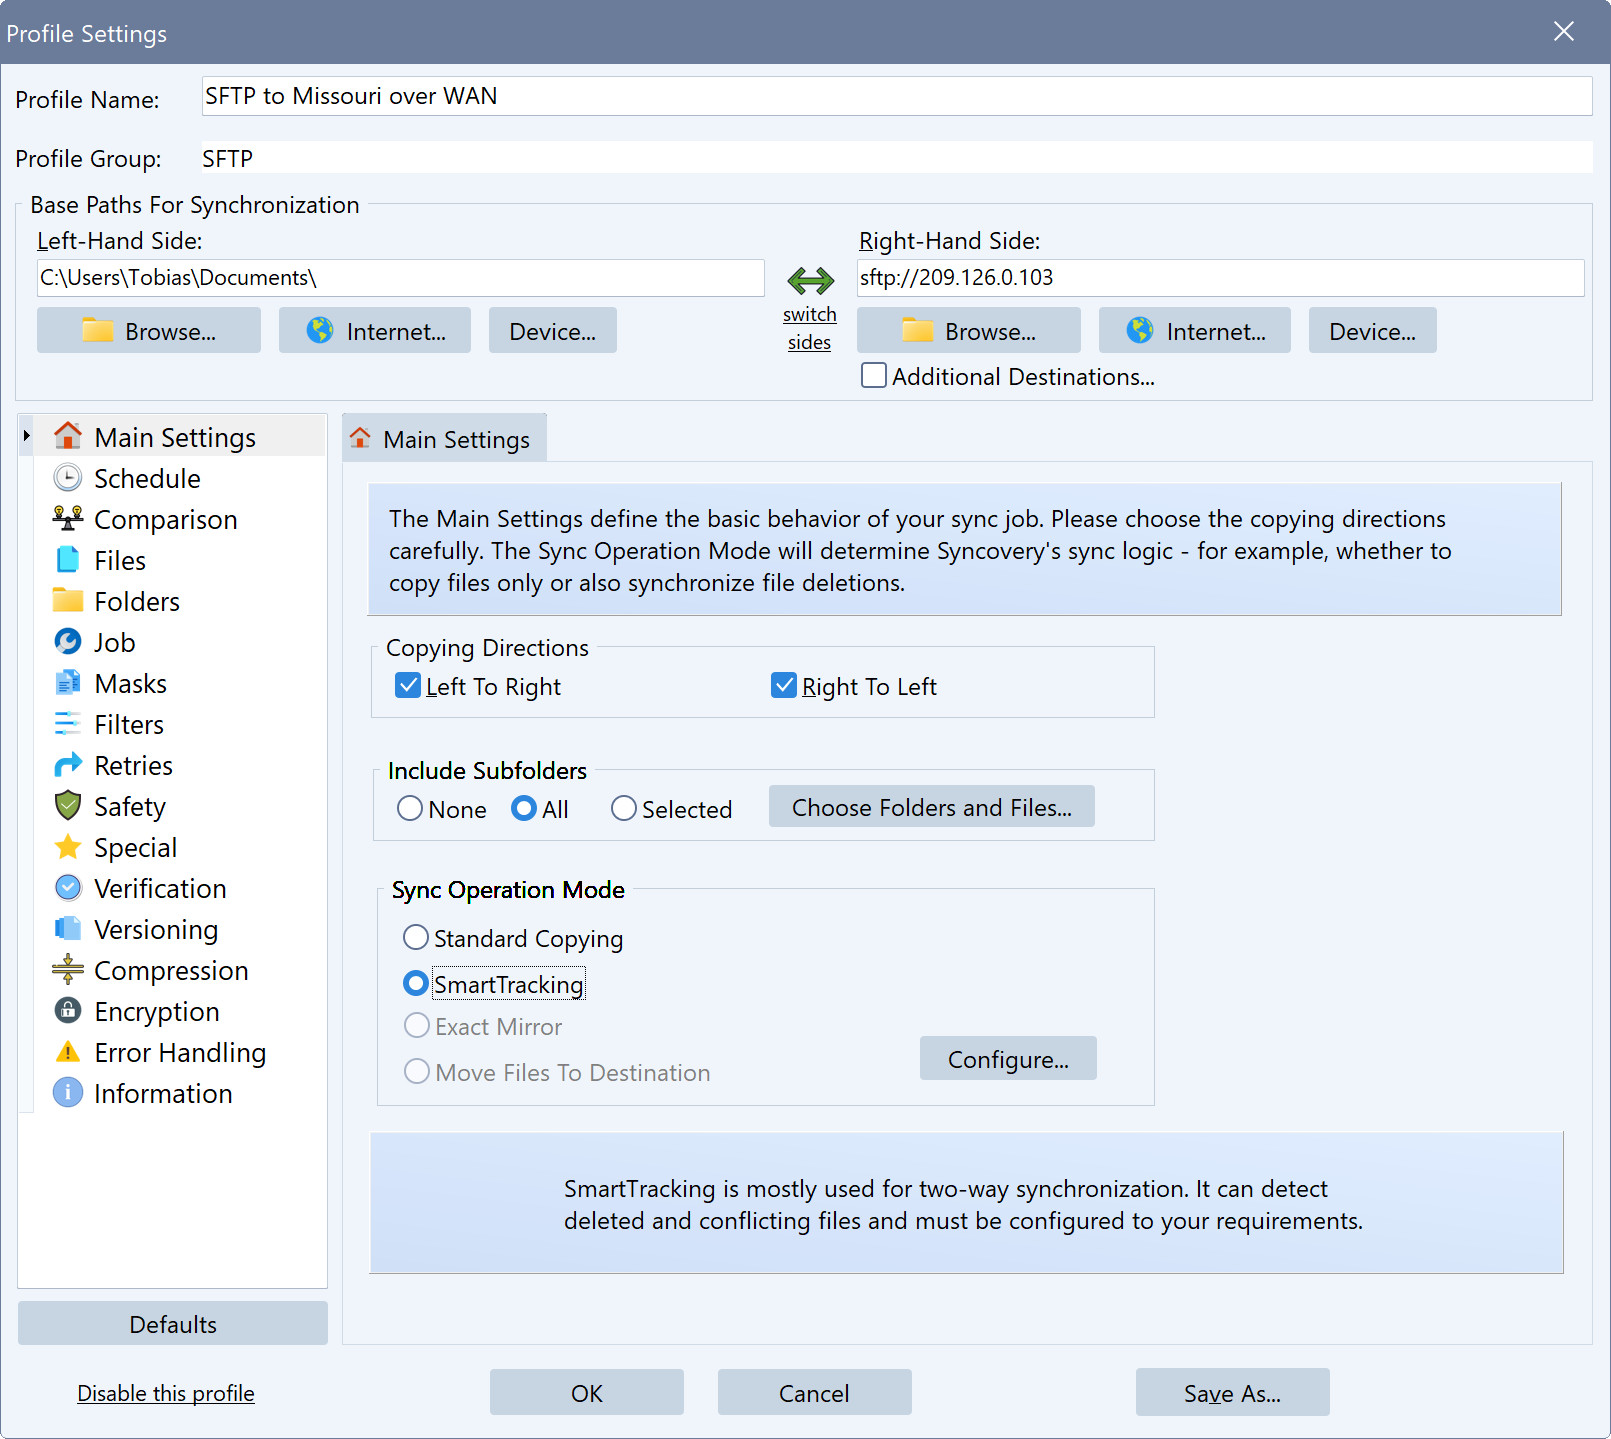
Under Main Settings in Syncovery 11, choose the Copying Directions and the Sync Operation Mode. Note that you don’t actually have to let Syncovery copy any files – you can also just use it to compare the folders and show you the differences.
To ensure that no broken transfers are left as incomplete files, please choose the setting Automatically resume (copy with temporary filenames) in the Files category in the profile.
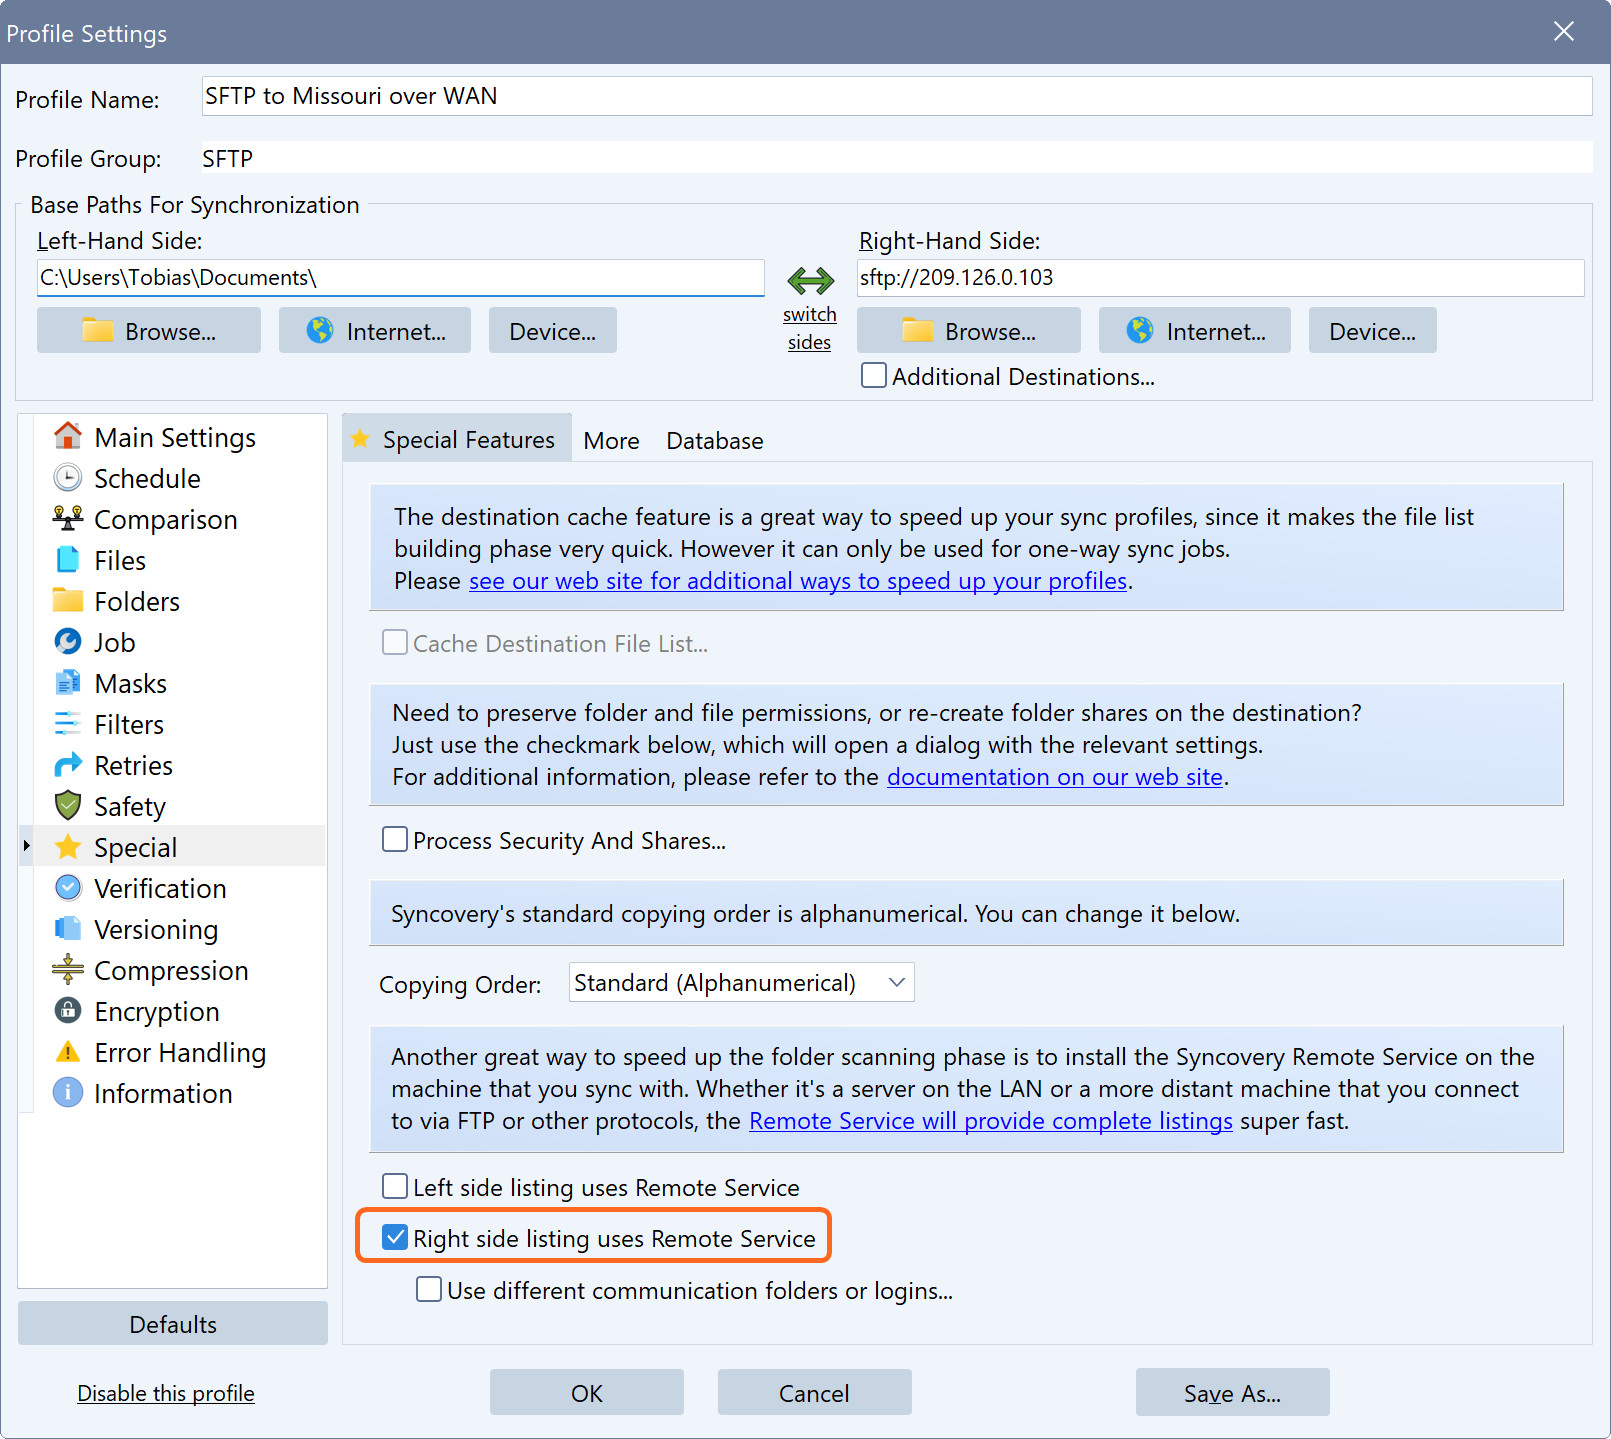
Finally, to greatly speed up the folder listing, specify the the Remote Service should be used for the listing. This works only if the profile’s base path is specified under Remote Listing on the other PC, which we did as one of the first steps near the beginning of this guide.
Starting the Syncovery Profile
You can now start the job. Remember that there are various ways to run a Syncovery profile. It can be started manually or by the scheduler. It can run in Attended Mode, or in Unattended Mode, or in the Background, or in the Background With Preview.
If you would like to see the list of proposed copying actions before letting Syncovery copy files, make sure you start the job in Attended Mode or in the Background With Preview. To see all choices for starting a profile, please right-click it from the Profile Overview in Advanced Mode, and you will see these menu items:

