One of Syncovery’s unique features is the internal User Management. You can set up multiple users and assign different rights. Users can be administrators or limited users. Users can own profiles. They can be configured to see only their own profiles, or profiles of their Active Directory Group, or all profiles.
You can define user passwords in Syncovery internally, or use Windows accounts and login credentials. You can also register Active Directory Groups so that users will automatically inherit the group rights. If you allow Windows logins, then user accounts are automatically added to Syncovery’s user list when a user logs in the first time.
The documentation on this page applies to Syncovery version 10.14.15 or newer.
Activating Syncovery’s Internal User Management
The internal User Management is activated on the Program Settings dialog, tab sheet “Misc”:

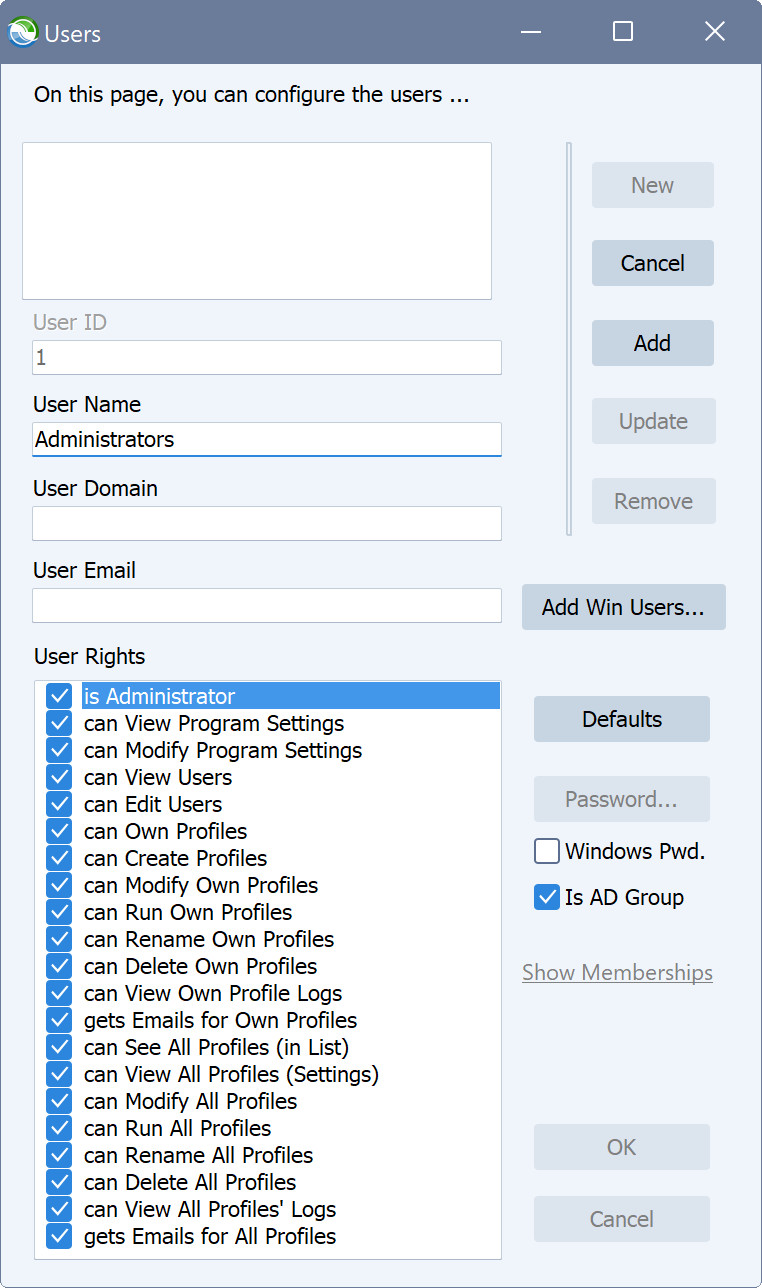
Next, click the button “Edit Users…”. The first user or group you need to add must be an Administrator. In the screenshot below, we will add the Active Directory Group “Administrators”. To do this, click the “New” button, type the group name in the “User Name” field, click “is Administrator” in the User Rights list, and also choose the checkbox “Is AD Group”. Then click the “Add” button.
Adding a non-Admin Active Directory Group
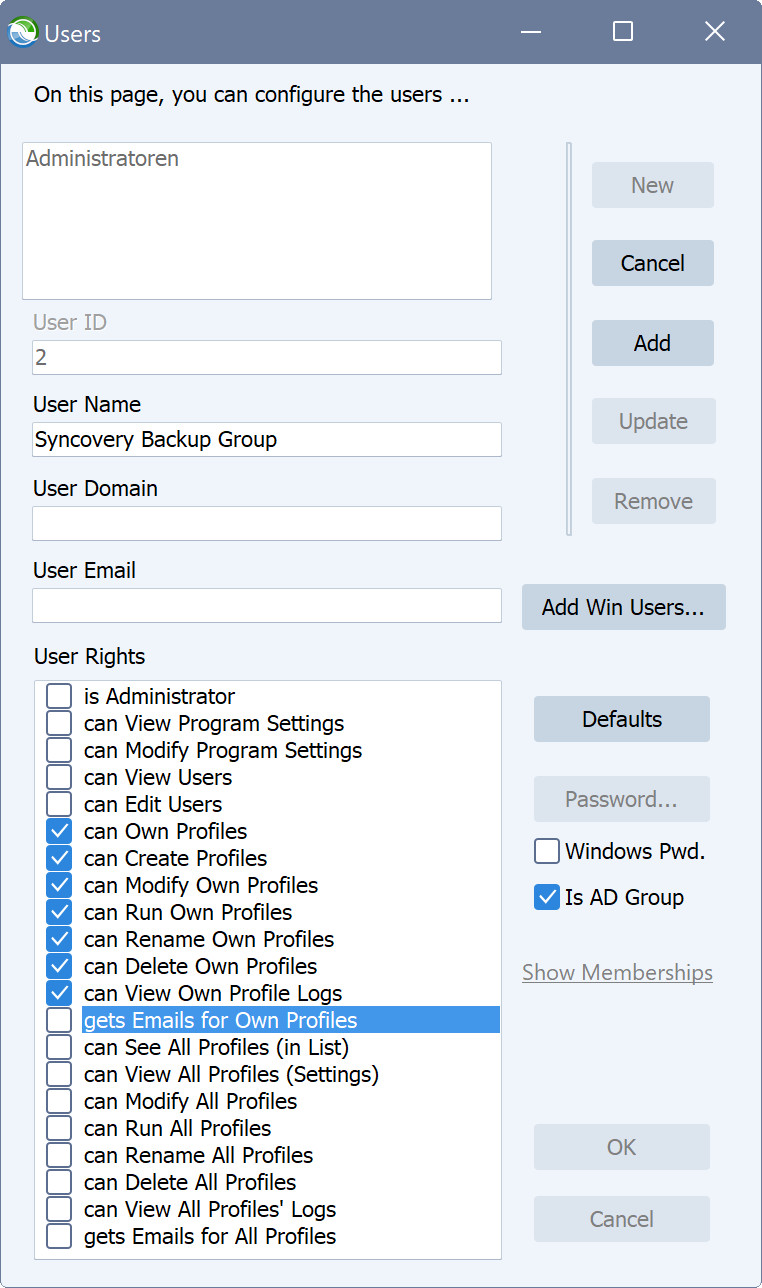
Because all Windows Administrators will automatically become Syncovery Administrators, you will now want to set up normal users. As an example, we will add a group called “Syncovery Backup Group”. We created this group as an AD group in Windows, and now we will add it to Syncovery. This group will have limited rights. Again, click the “New” button, type the group name in the “User Name” field, and choose the checkbox “Is AD Group”. Then click the “Add” button.
Logging in As a User
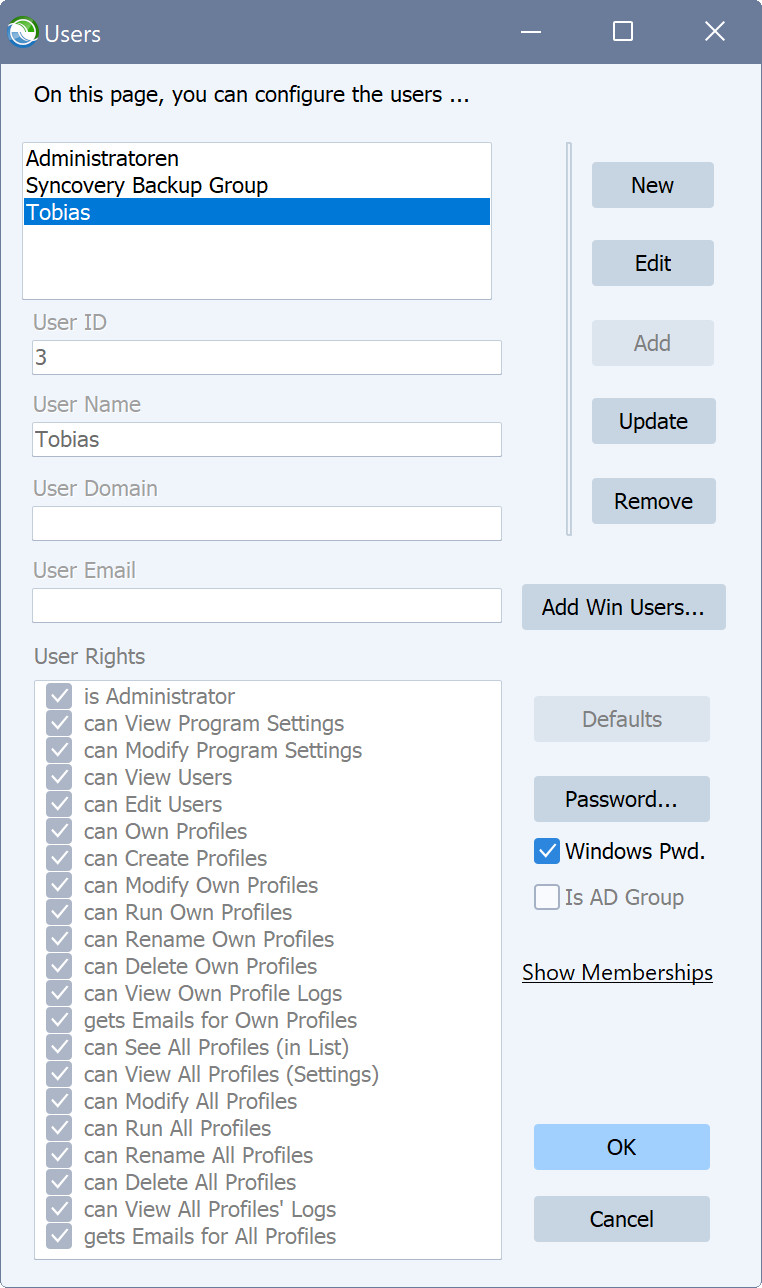
Next, please close Syncovery and open it again. You will be asked to log in. For the first login, we will use an account that is part of the Administrators group. You will see that the user account is automatically added to Syncovery’s user list and gets full admin rights:
Assigning Profiles to a User or Group
Each Syncovery profile can be owned by a user or group. When editing a profile in Advanced Mode, you will find a little “Users” link at the bottom right of the profile editor dialog box:

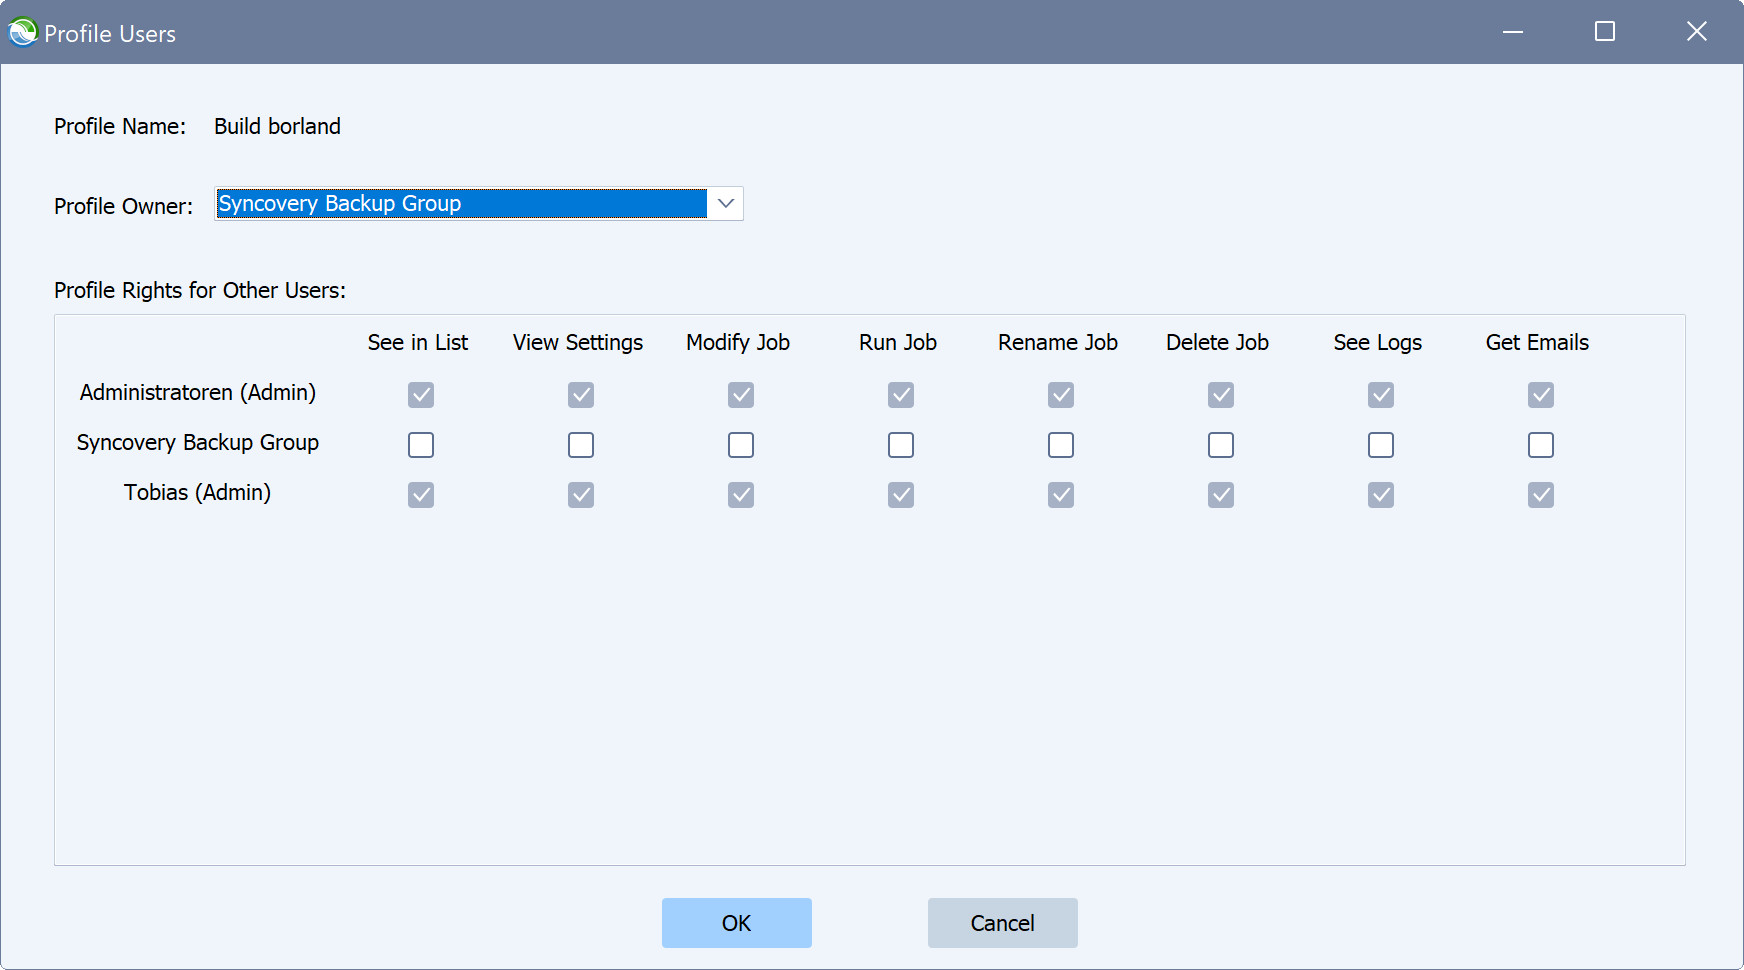
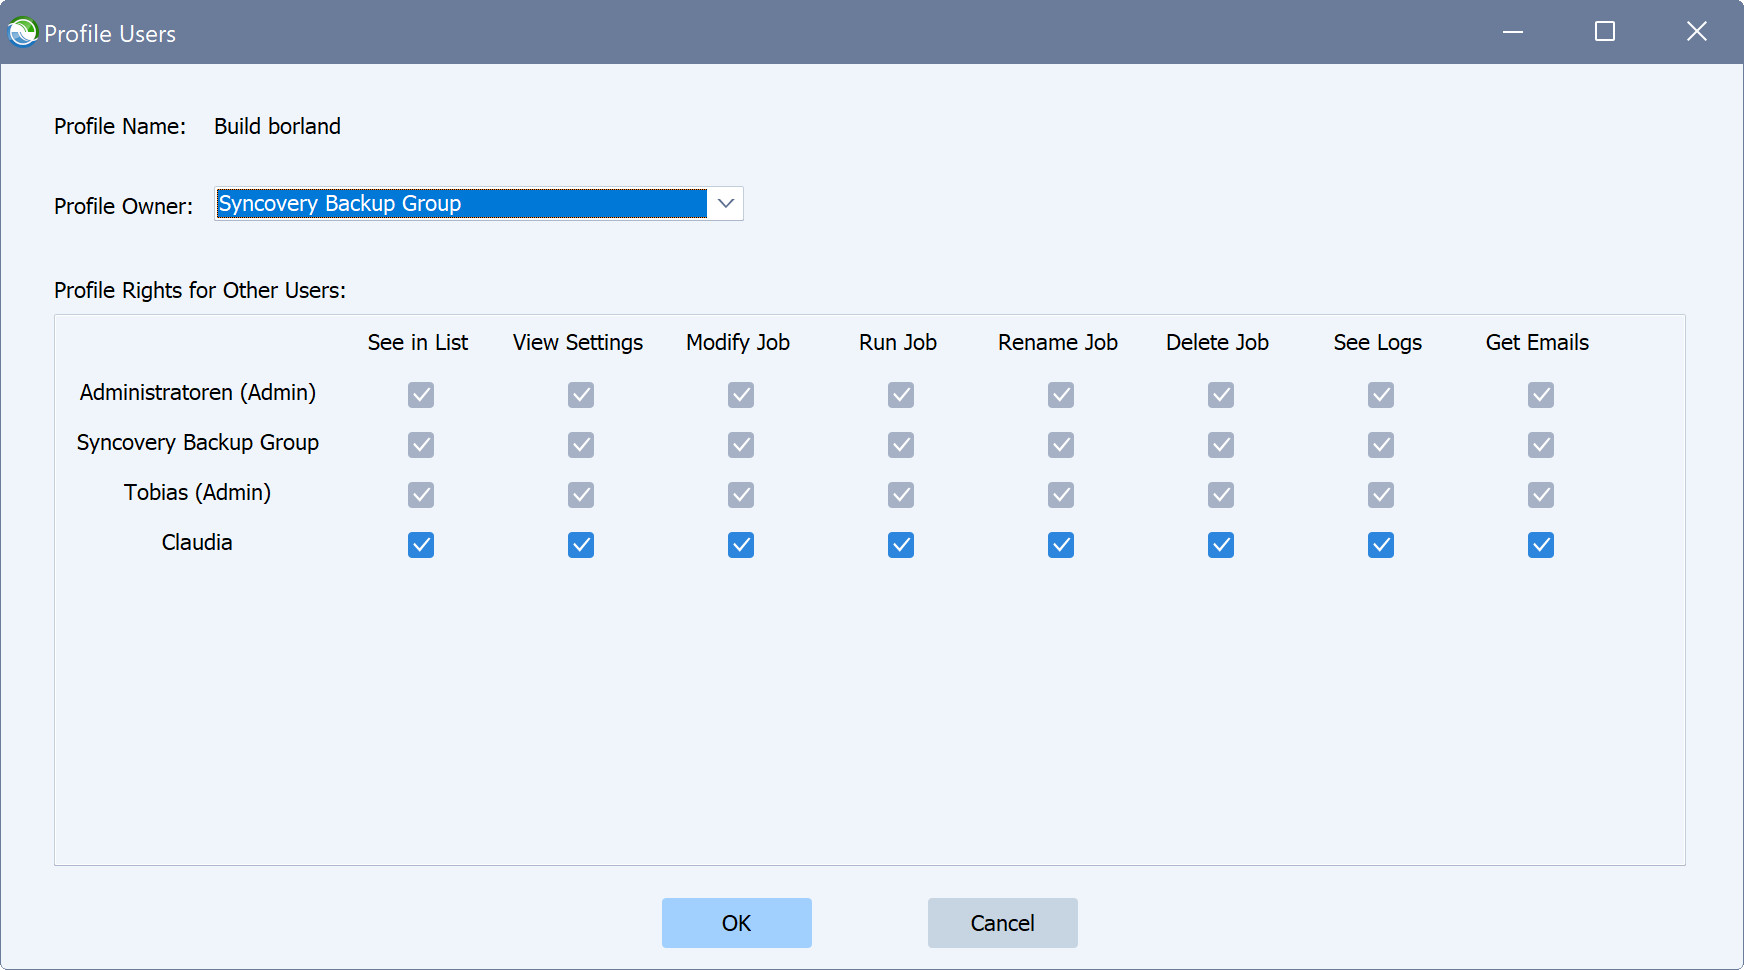
This link will open a dialog box where the profile owner can be chosen, and rights to the profile can be assigned to other users. Note that the checkboxes in the Syncovery Backup Group row don’t need to be checked, as the owner always has full control on a profile:
Logging in As a Non-Admin User
Next, we will log in as a non-admin user who is part of the Syncovery Backup Group. The user Claudia will see only her own profiles, as well as profiles assigned to the Syncovery Backup Group:
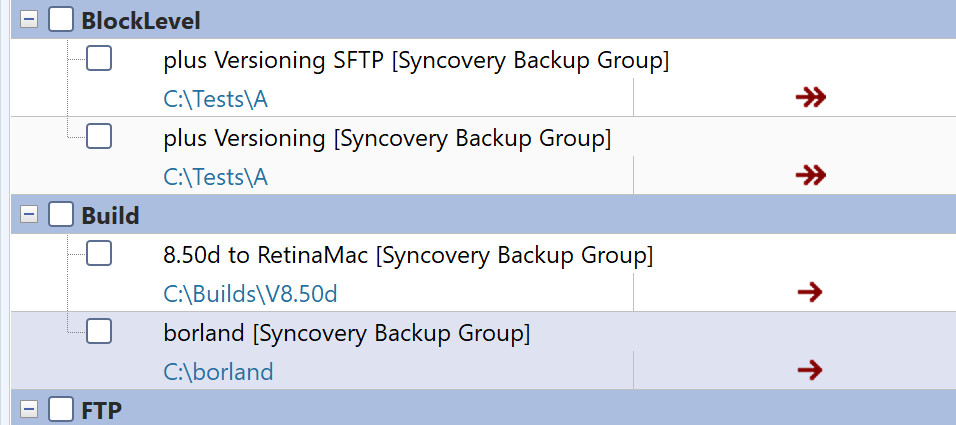
The user can see and edit all profiles which are owned by the Syncovery Backup Group. The “Profile Users” dialog now looks like the following screenshot. We chose the checkmarks in the new user’s row, although it is not necessary, since the user is part of the group:
If you have any questions about Syncovery’s User Management feature, please contact support.
