Introduction
Are you looking to ensure your data is backed up or kept in sync across various devices and platforms? Syncovery, a powerful file synchronization and backup software, provides an efficient and reliable solution tailored for use with Google Cloud Storage and other types of storage. Whether you are safeguarding a small office’s files or managing vast amounts of data, Syncovery offers the flexibility and features necessary to meet your data protection needs. Its robust functionality includes real-time sync, compression, Synthetic Backup, and automated backup scheduling, making it an ideal choice for IT professionals. It’s also extremely customizeable and can be adapted to fulfill special customer requirements.
Syncovery’s integration with Google Cloud Storage allows you to leverage the scalability and security of cloud services to keep your files safe and synchronized. With support for various cloud storage protocols and encryption standards, Syncovery ensures that your data is transmitted securely and stored safely in the cloud. The seamless connection not only enhances data availability and recovery speeds but also simplifies the management of data across multiple locations. Whether you’re looking to perform straightforward backups or complex synchronizations, Syncovery stands out as a comprehensive solution for Google Cloud Storage that adapts to your specific requirements.
Feel free to look around our web site to learn more about Syncovery in general. This page focuses mainly on the technical aspects of connecting Syncovery with Google Cloud Storage. This process is actually straightforward and easy.
Choice of Google Cloud Storage API
Syncovery supports two different protocols to access Google Cloud Storage: the older S3 compatible XML API, which is covered on a separate page. And the more modern and powerful JSON API , which is recommended to use and described on this page.
Since version 10.11.0, Syncovery is authorized for use with Google Cloud Storage using Service Accounts or the gcloud CLI. These methods allow flexibility in giving Syncovery either full Admin access to the Google Cloud Storage account, or allow it to work with individual buckets only. If you already have the gcloud CLI installed and connected to your GCS account, you’re all set and you can start using Syncovery immediately.
Many steps described on this page are needed only if you want to authorize Syncovery directly, without the gcloud tools. If you have the gcloud CLI, it is much simpler. Just choose the Google Cloud Storage protocol in Syncovery and choose to authorize via gcloud.
Setting up a Service Account is not difficult, but it involves a few steps. This page will guide you through the steps of creating a Service Account for Syncovery and assigning the permissions it needs.
Step 1: Creating a Service Account in the Google Cloud Console
This step is only needed if you don’t have a fully authorized gcloud command line tools installation yet. A Service Account is easily created in the Google Cloud Console, on the Service Accounts page. Choose your project and click the button “CREATE SERVICE ACCOUNT“:

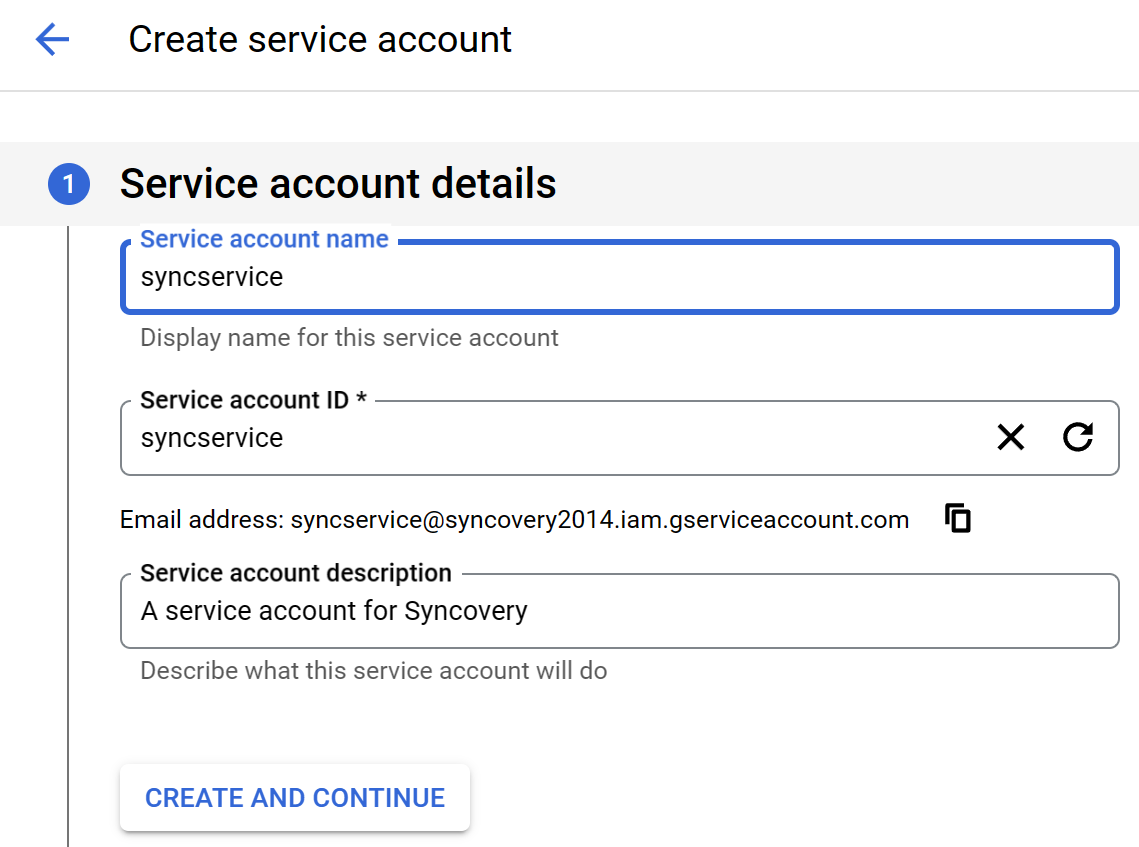
Next, you will see the following form, where you need to give the service a name and an optional description. The service account ID will be generated automatically. When done, click “CREATE AND CONTINUE”:
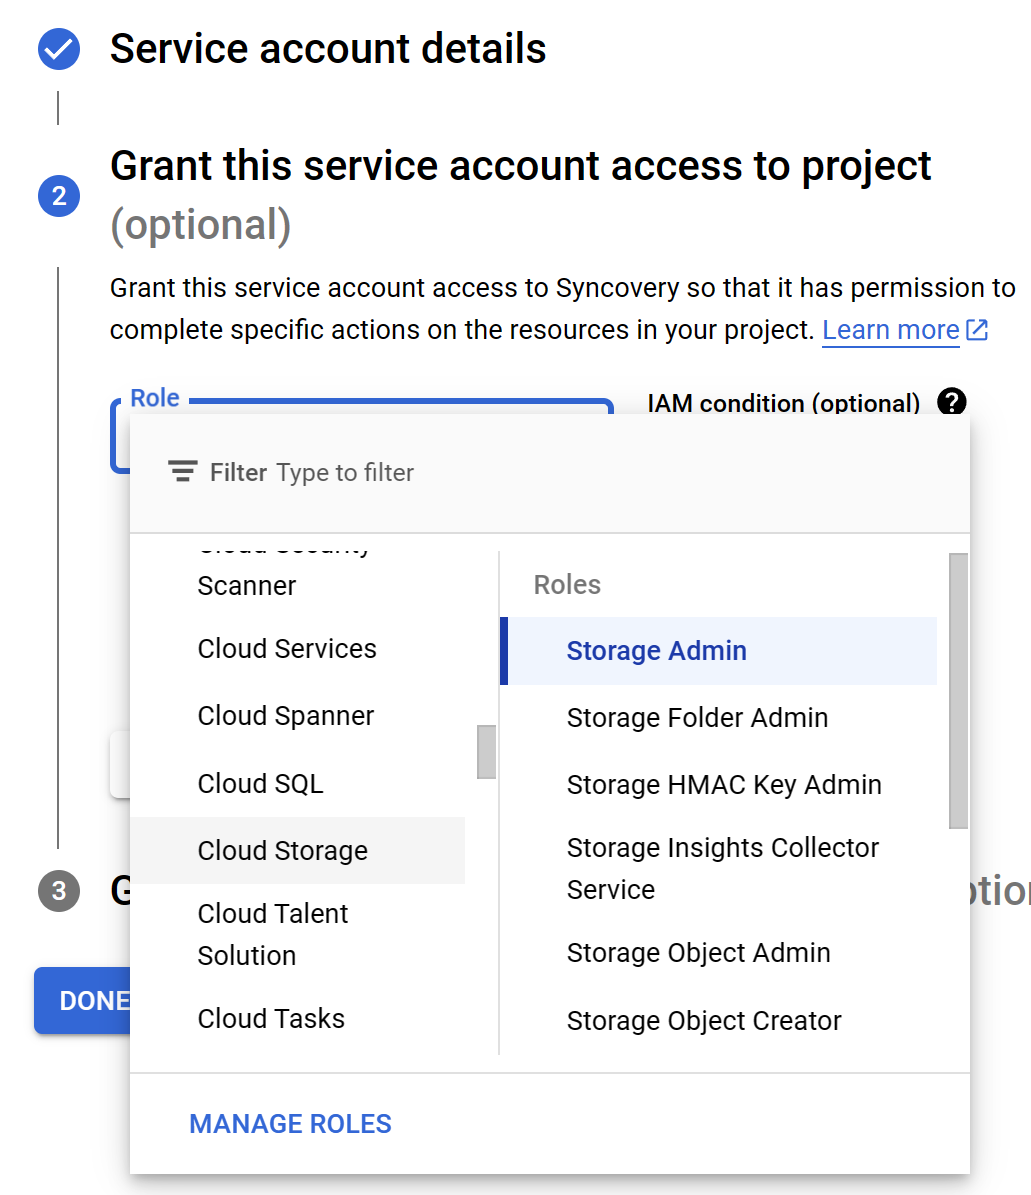
Now’s the time to decide if Syncovery will have full control over the whole Google Cloud Storage account, or if you will later assign more granular permissions. If you don’t want to bother with individual bucket permissions, you can assign Syncovery the role “Storage Admin”. However this is not required.
You can now click “DONE”, since we do not need step 3. The service account will now be created and you can see it in your list of service accounts. It will have an email address used for identification, such as “syncservice@syncovery2014.iam.gserviceaccount.com“. This is a good time to copy this address and save it somewhere for later use.
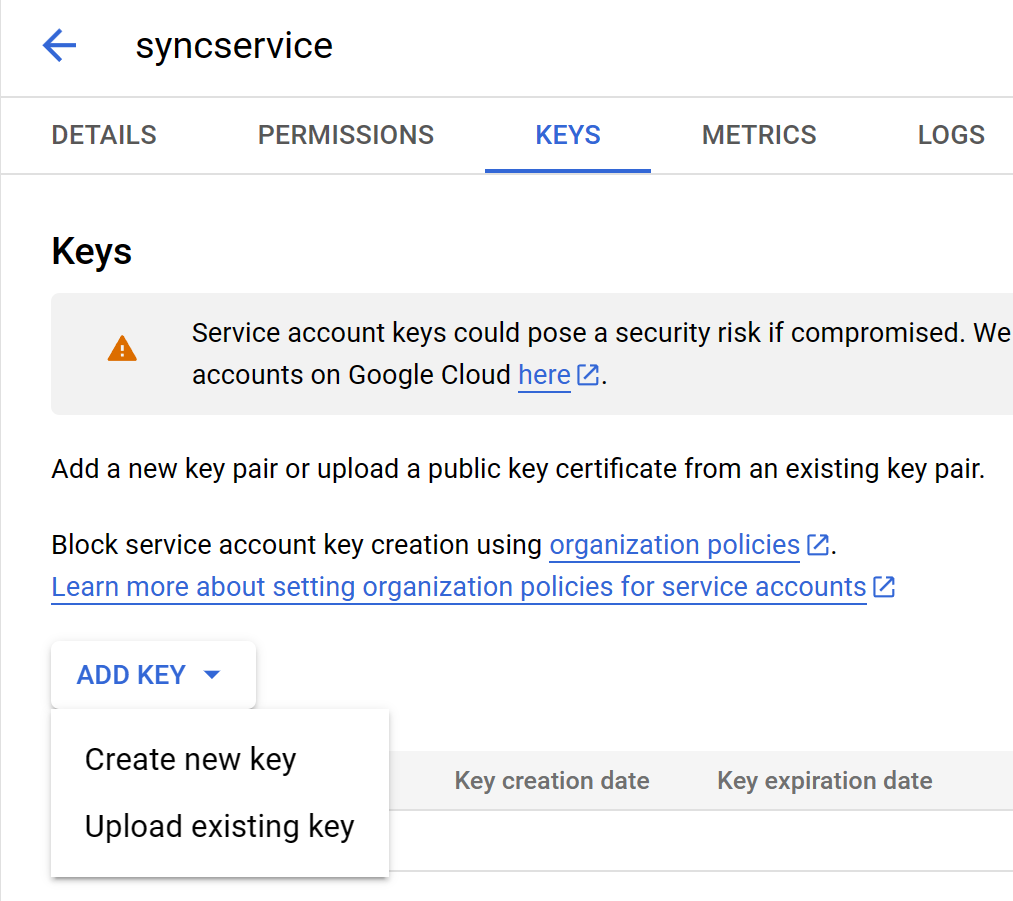
Syncovery can obtain access using the Service Account with a Private Key, or via the gloud CLI. If you have the gcloud CLI installed and activated, you do not need to give Syncovery a private key. Otherwise, you need to create a key for the account. Click on it and go to the “Permissions” tab as shown below, click on “ADD KEY”, and choose “Create new key”:
Choose the JSON format and click CREATE:
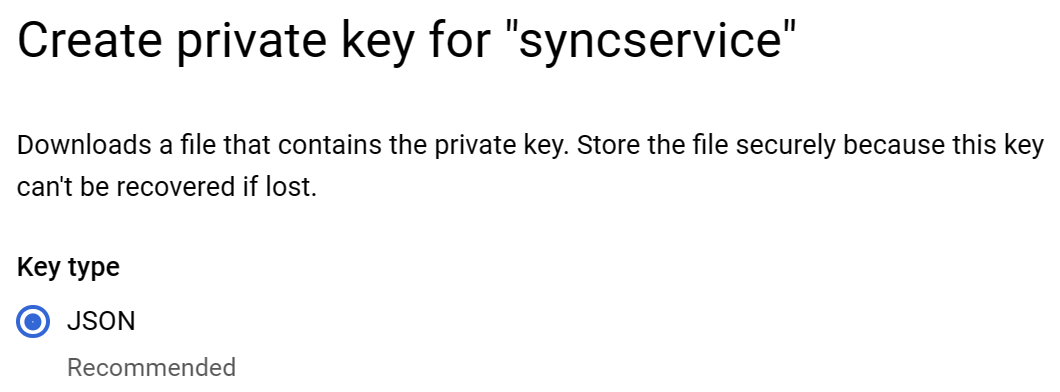
The Private Key is now saved to your computer in a json file, with a filename similar to “syncovery2014-9a29ca47fe28.json”. Save this file in a save place. The private key needs to be imported into Syncovery later on. It is extremely confidential and should be kept safe.
Step 2: Assign Permissions for Individual Buckets
It is possible to assign permissions for each bucket separately. This step can be skipped if you assigned the Storage Admin role when creating the Service Account. To assign permissions on a bucket level, head over to the Google Cloud Storage Browser.
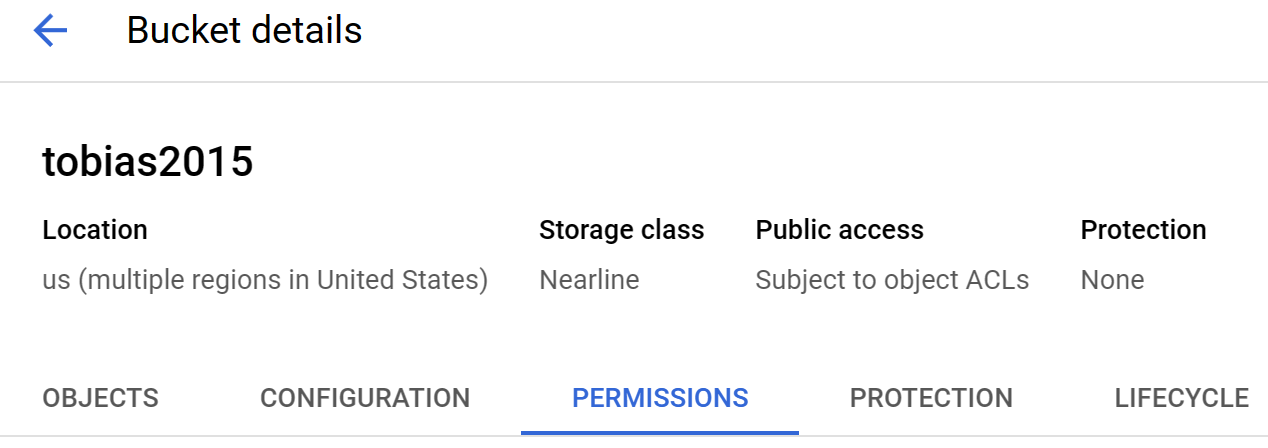
Click on the bucket you want to work with, and go to the PERMISSIONS tab:
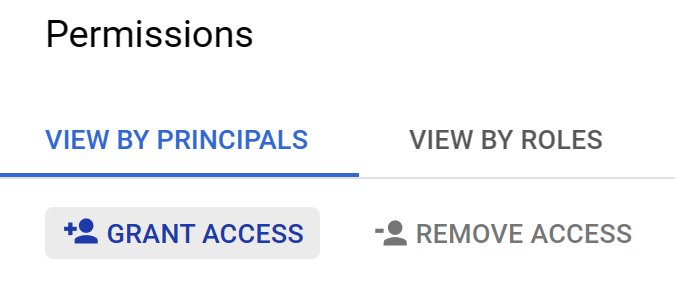
Further down, click on GRANT ACCESS:
Next, you need to specify the service’s e-mail address, which is used as an ID. In this example, the e-mail address is syncservice@syncovery2014.iam.gserviceaccount.com.
For the best operation, please choose the role Storage Admin. This will give Syncovery full control of this bucket only, not of the whole Cloud Storage account.
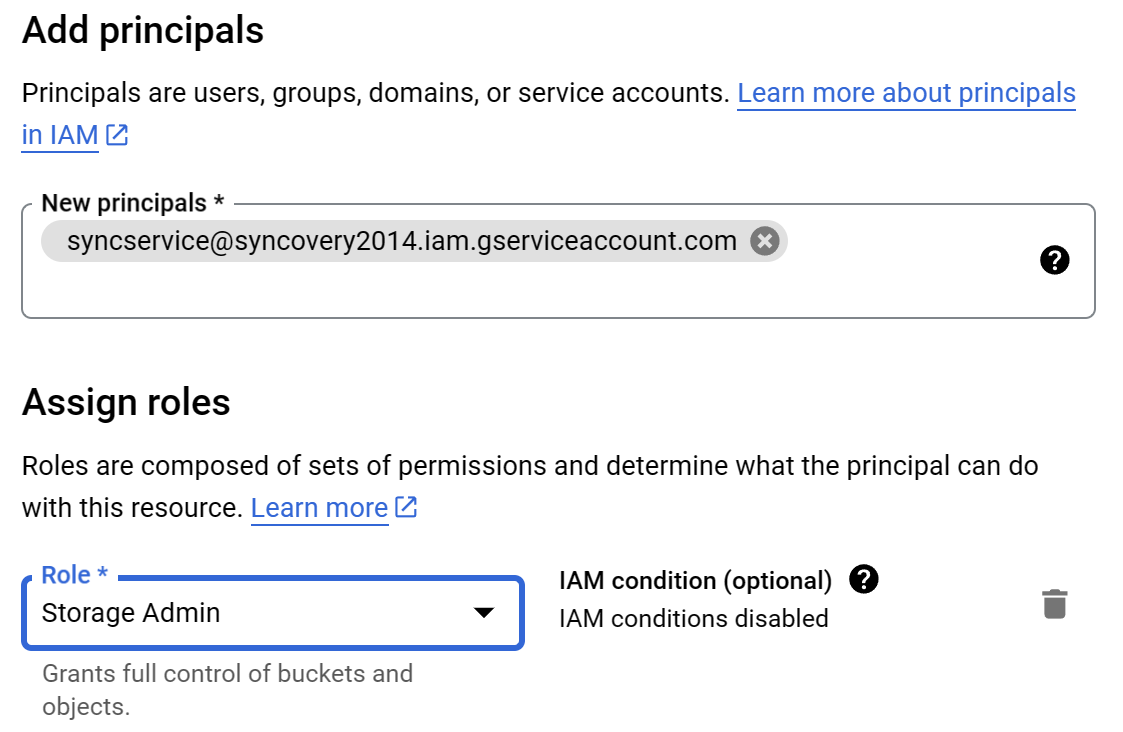
Click Save and you’re done. The Service Account can now be used in Syncovery.
Step 3: Using the Service Account in Syncovery
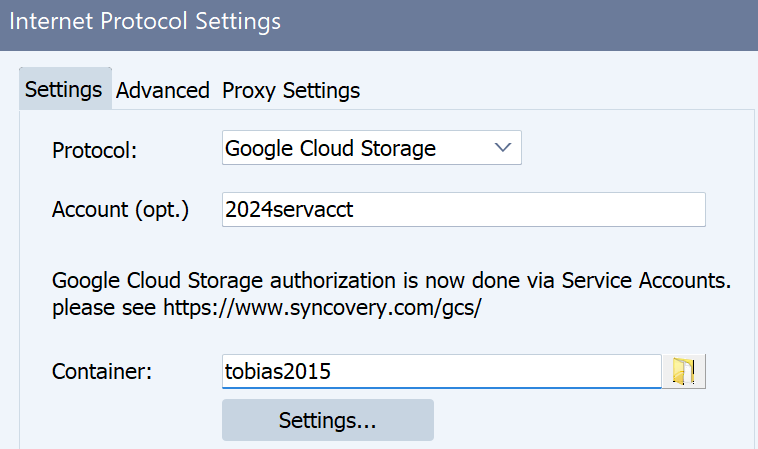
To access a Google Cloud Storage bucket in Syncovery, please click on the Internet button on one side in the profile, and change the protocol from FTP to Google Cloud Storage. If you will work with multiple different service accounts, you should type an optional internal ID into the field “Account (opt.)”. This optional account name is only an identifier within Syncovery and does not have any real meaning. In particular, it does not have to be the storage account ID or e-mail address.
Click on the Settings… button to specify the Service Account Details:
Syncovery will now ask you for the service account’s email address:

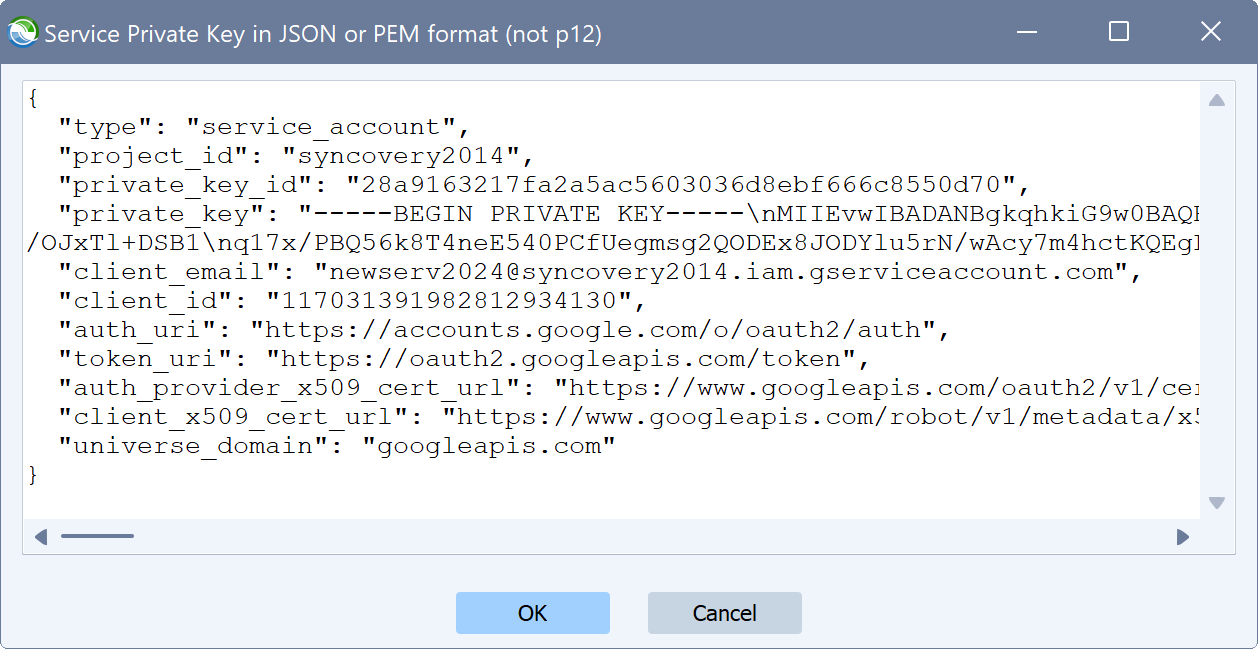
And for the private key. Open the previously saved json file in a text editor, and copy and paste its contents into the dialog box, which will look like this:
Now you’re all set and the rest should be really easy.
If you know the bucket name that Syncovery should work with, you can type it into the “Container” field.
On the other hand, if you gave Syncovery full control over the storage account, you can click the Browse button next to the Container field to get a list of buckets to choose from.
Finally, you can click the second Browse button to choose a folder within the bucket.
