Using Syncovery with Synology DSM 7
Syncovery is fully compatible with Synology’s latest software, DSM 7, offering a robust file synchronization and backup solution. However, when you install Syncovery directly on your Synology NAS, there are some additional steps required to grant the software the necessary permissions to access your folders. These steps are crucial to ensure that Syncovery can perform its tasks efficiently and securely.
It’s important to note that these permissions are only necessary when running Syncovery directly on the NAS itself. If you’re running Syncovery on a Windows or Mac system and accessing your Synology NAS over the network, the permissions and access management are handled differently and typically require less configuration on the NAS side.
This guide will walk you through the specific steps needed to add the appropriate permissions for Syncovery on DSM 7, ensuring smooth operation and full access to the folders you need to sync or back up. By following these instructions, you’ll be able to harness the full power of Syncovery on your Synology NAS without any hiccups.
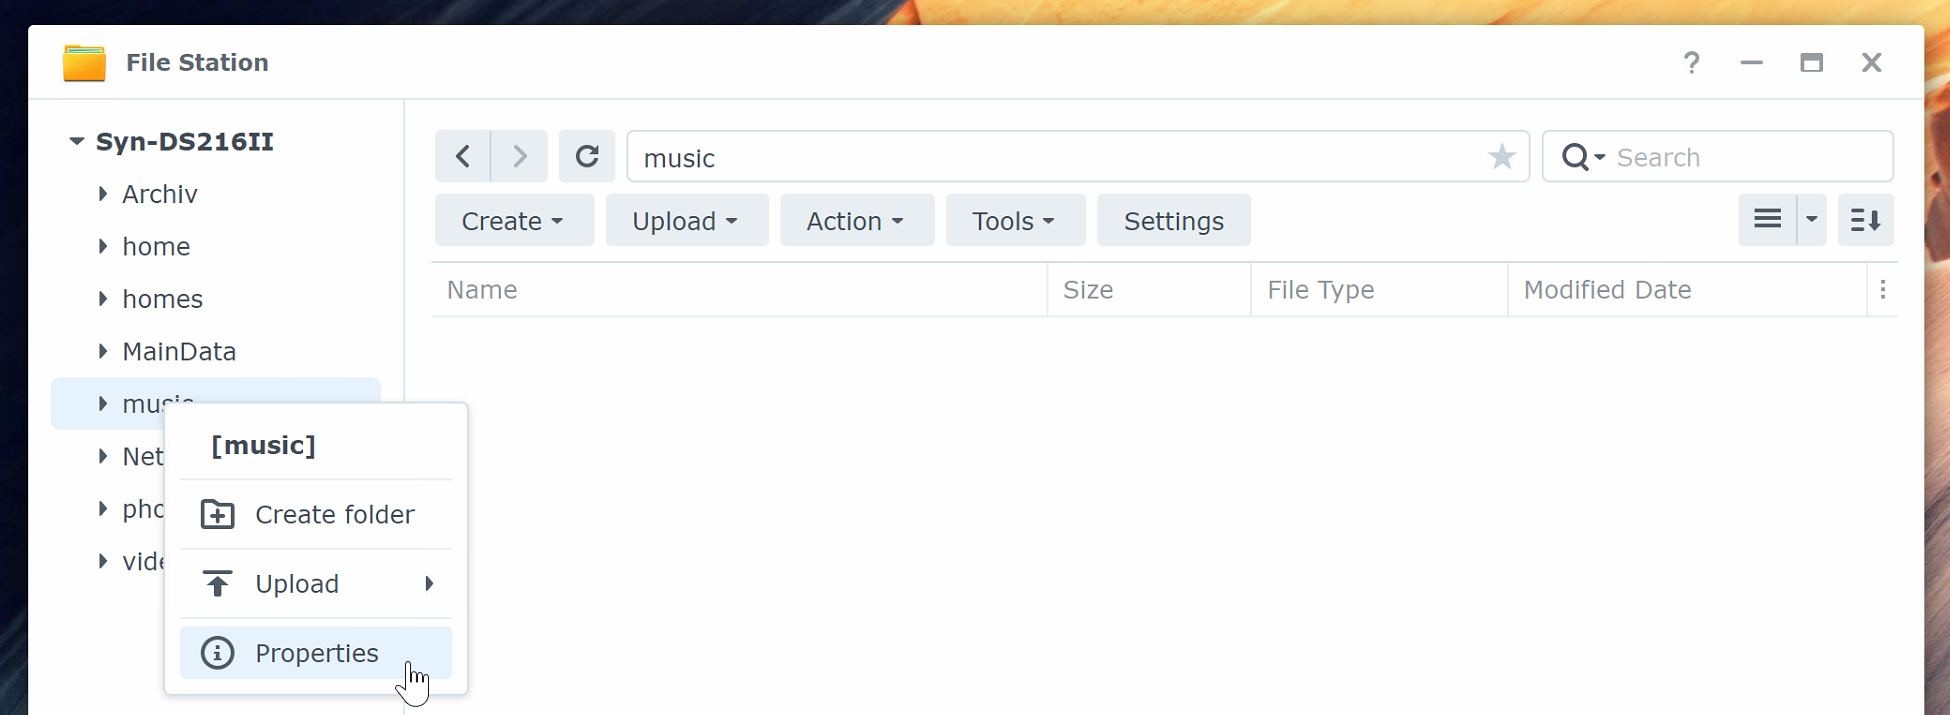
Step 1: Open DSM 7 File Station
Find your folder in File Station and right-click it to access its Properties.

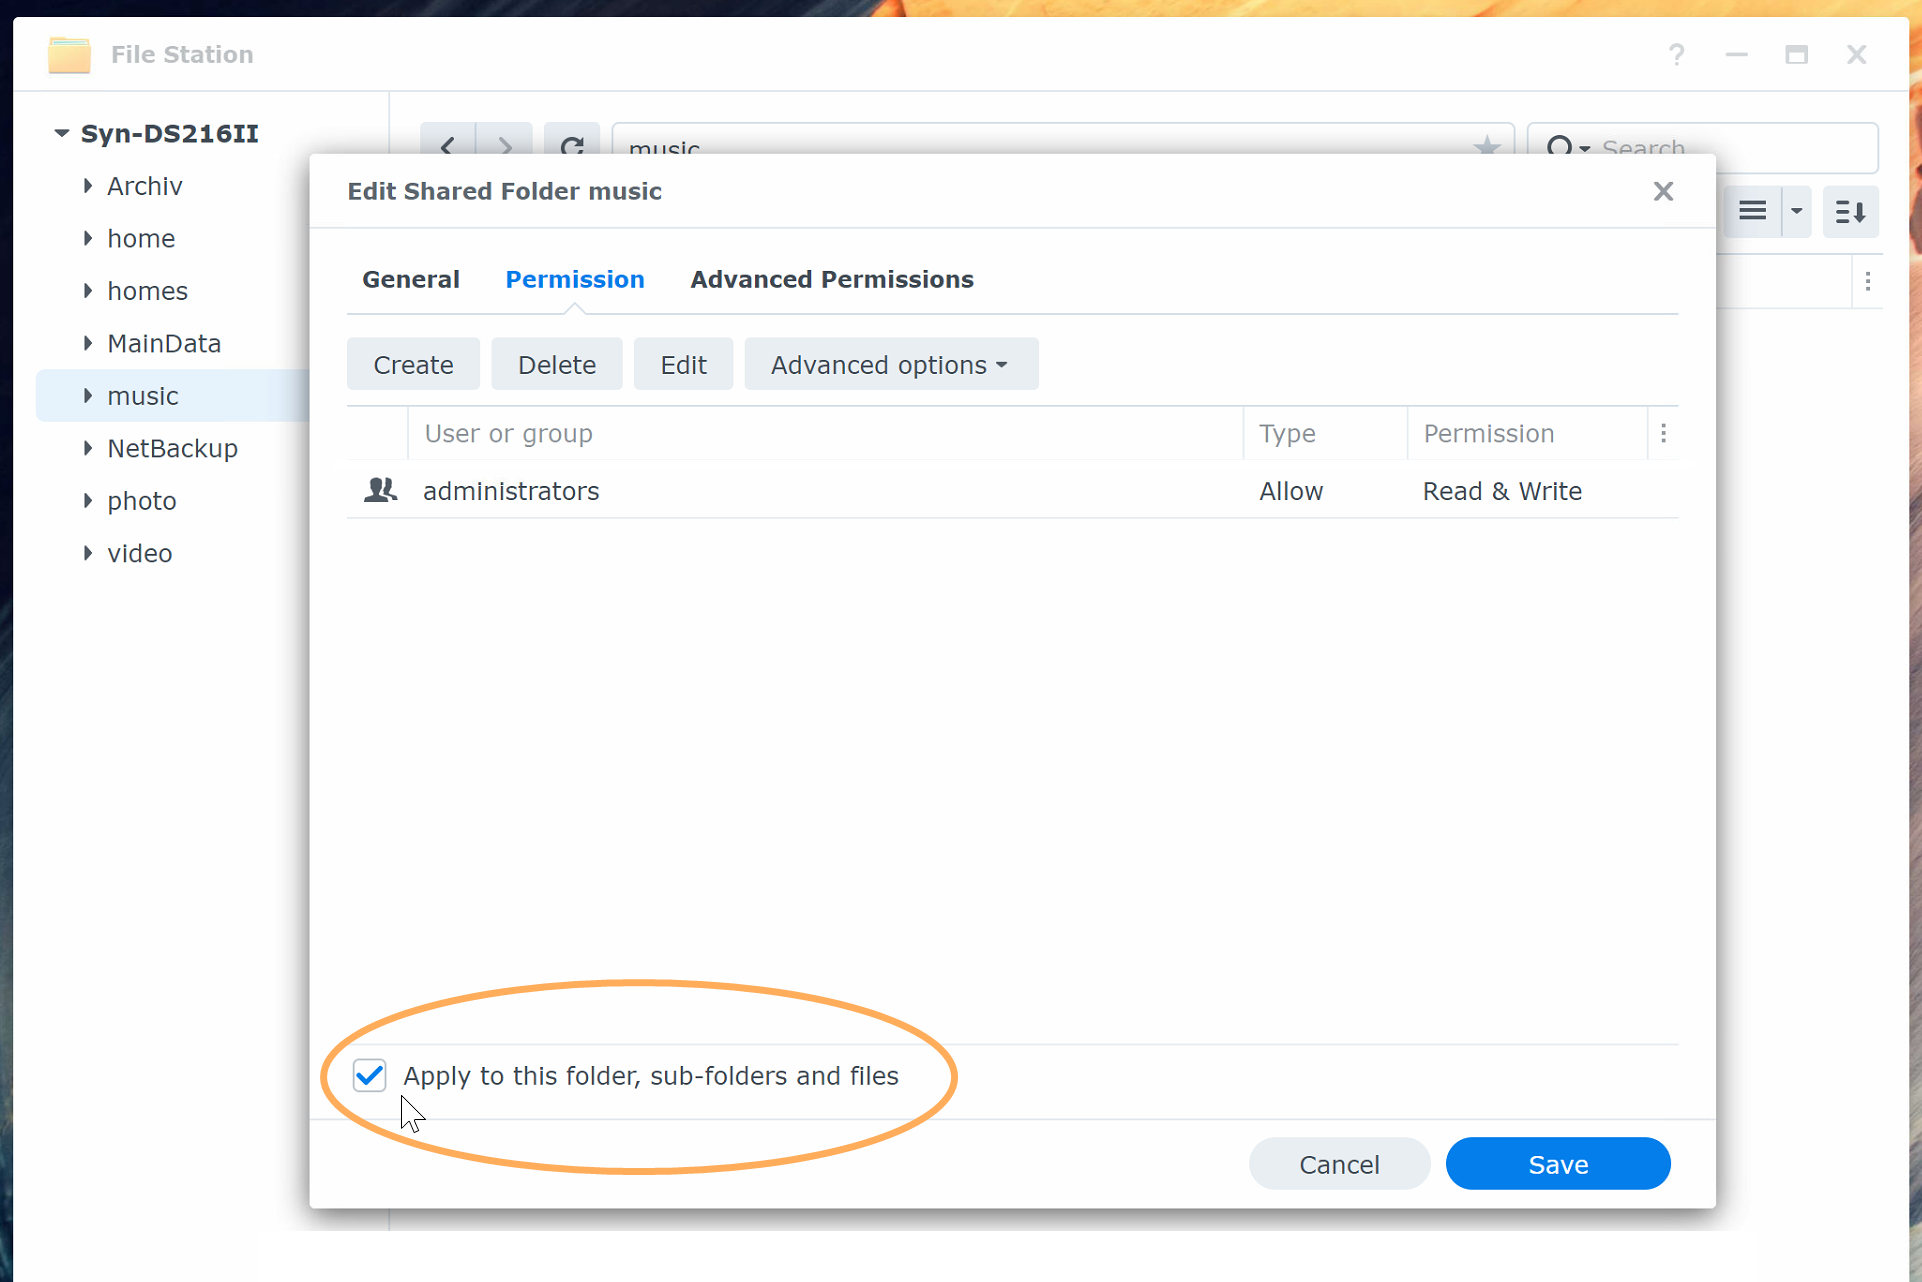
Step 2: Edit Permissions
Now go to the Permission page and choose the checkbox at the bottom.

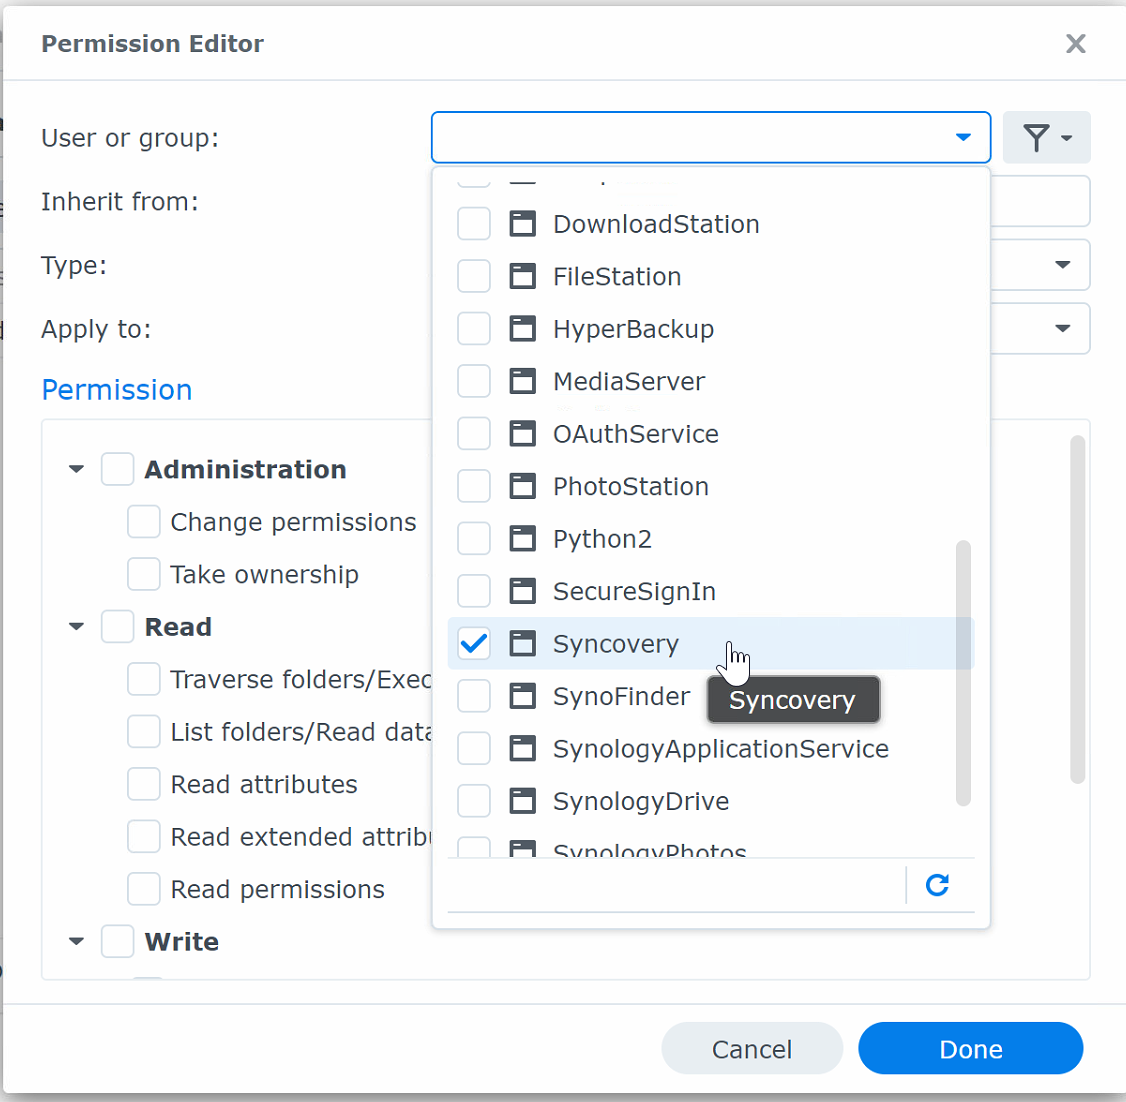
Step 3: Click the Create Button to Add a User

Step 4: Choose Syncovery from the User List

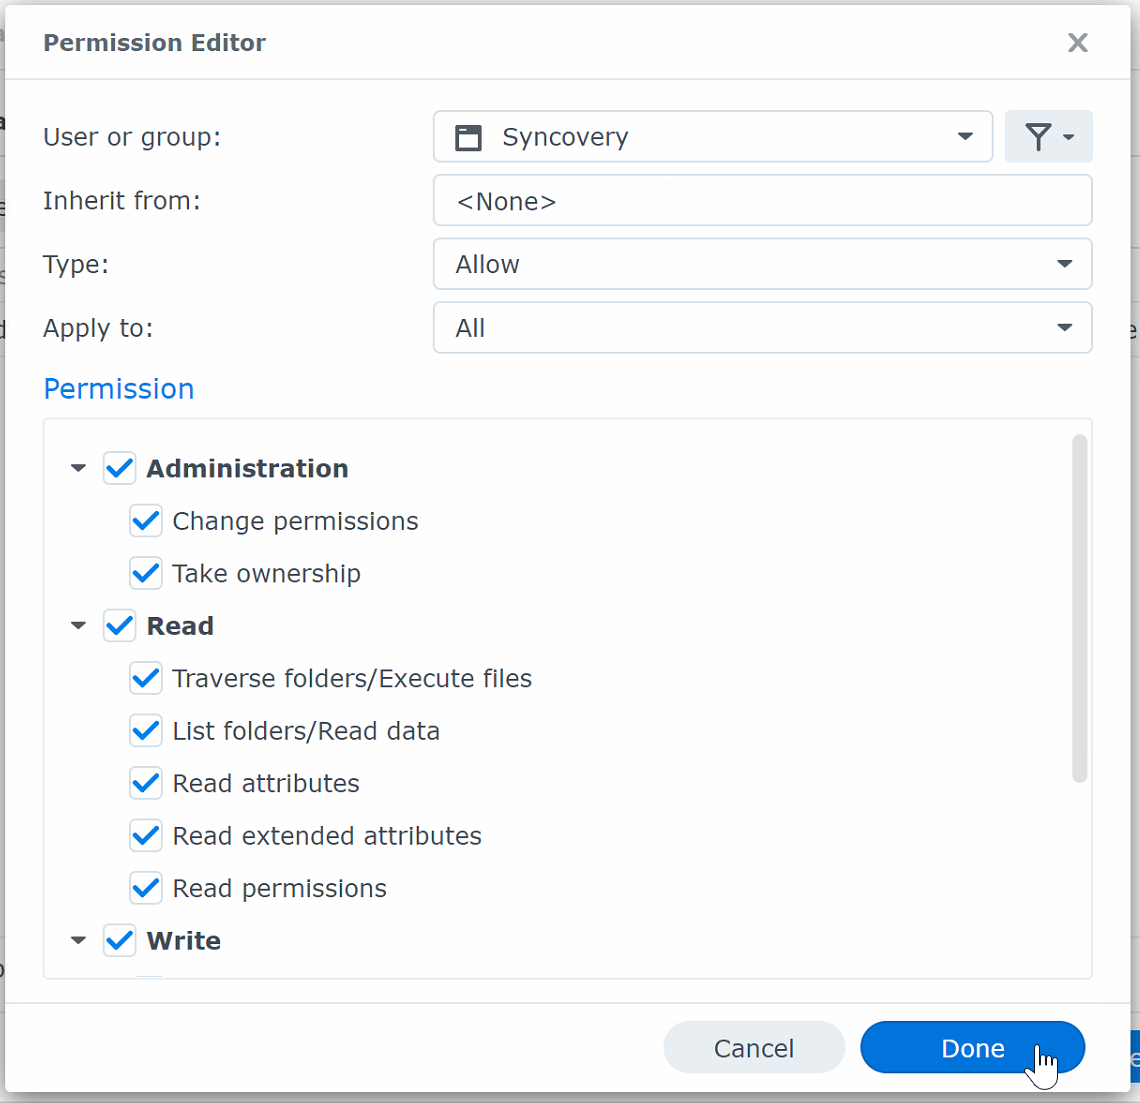
Step 5: Give Syncovery Permissions
Give Syncovery the required permissions and click Done.

Stel 6: Click Save and you’re done!
Now that you’ve successfully granted Syncovery access to your folders on your DSM 7 Synology NAS, you can take full advantage of the powerful features Syncovery offers. Whether you need to back up your data to the cloud, synchronize files between your NAS and other devices over the network, or automate complex file management tasks, Syncovery is equipped to handle it all with ease. With these permissions in place, Syncovery can operate seamlessly, providing you with reliable, secure, and efficient file synchronization and backup solutions tailored to your needs. Enjoy the peace of mind that comes with knowing your data is always up-to-date, backed up, and accessible whenever you need it.
