Managing machines remotely with Syncovery’s Montoring Tool
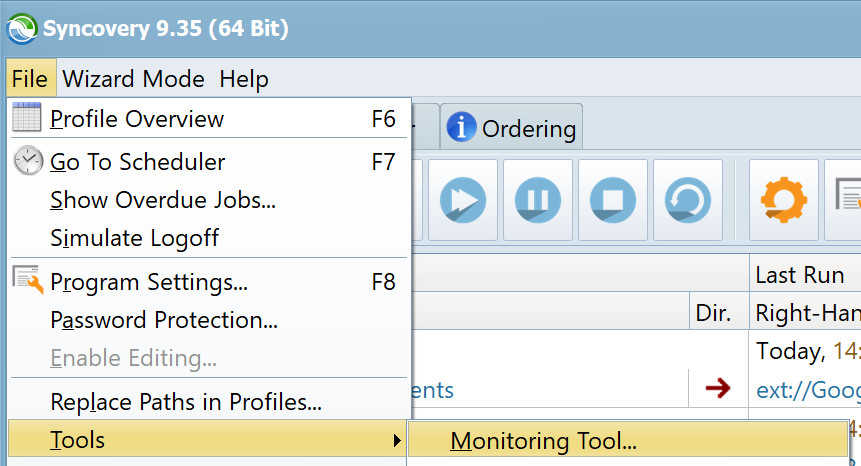
Syncovery includes a monitoring tool that allows you to view and manage Syncovery installations across multiple machines on a single dialog. You will find the Monitoring Tool in the File menu of Syncovery for Windows.
There are two ways how Syncovery can connect with remote machines:
Mode 1: Connect via Windows Networking (SMB/CIFS)
Connecting via Window networking is easy to configure, but it can only show the status of machines on the same LAN or VPN, and only if the machines are on and the Syncovery scheduler is running.
Mode 2: Exchange Information via Central Status Storage
Using a server storage location to save status files, you can manage any machine worldwide, and you can view the status of machines which are currently not connected, or even turned off. You can also monitor Syncovery running on Mac or Linux systems. Central status storage is a bit harder to set up, and the information shown can be slightly delayed. But it is a good choice if you can’t connect directly via LAN or VPN, or if you don’t have Windows networking credentials for the remote machine. The central status storage can be a folder on an (S)FTP server or use any of the other Internet/cloud storages supported by Syncovery.
Setting up Mode 1 (Windows Networking)
To monitor other machines on the LAN or VPN, you need to enter their computer names or IP addresses on the tab sheet “Configuration via Direct Connection (CIFS)“, as shown in the following screenshot. The machines need to be visible in Windows Explorer, so for example to monitor WIN10HOME, you need to be able to see the network shares of \\WIN10HOME in Explorer.
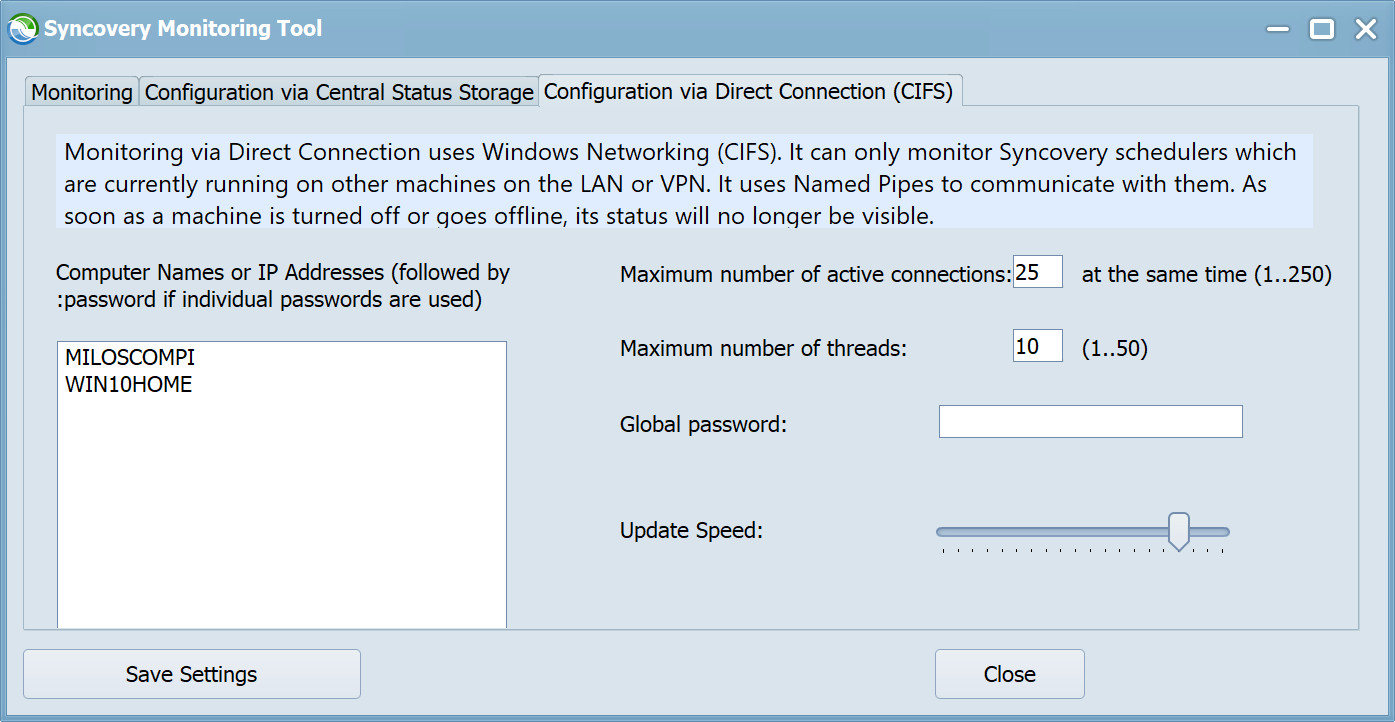
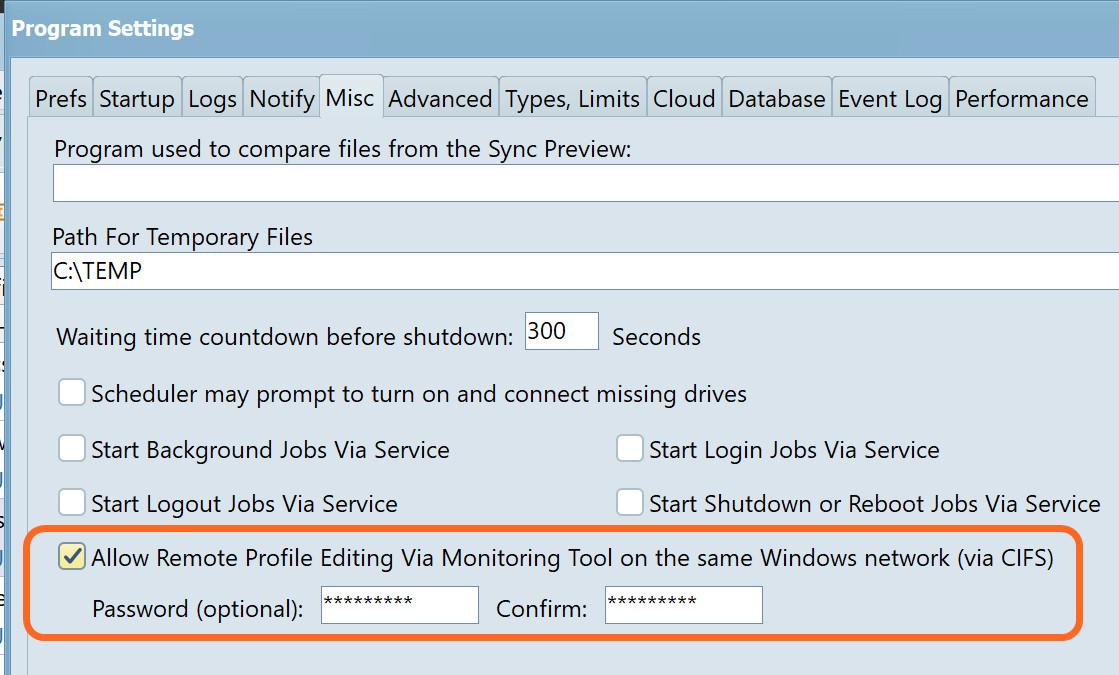
A password can be specified globally or for each machine. The password however is only needed to modify profiles, not to view the machine status. Permission to edit profiles must be given on the Program Settings dialog of each Syncovery installation that you want to manage. Please refer to the following screenshot.
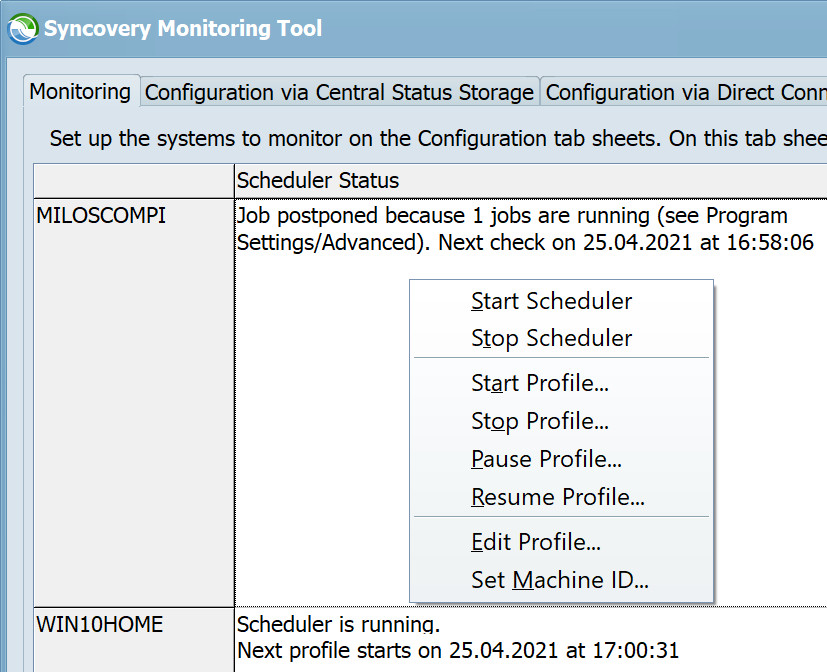
The following screenshot shows how the machine status is displayed.
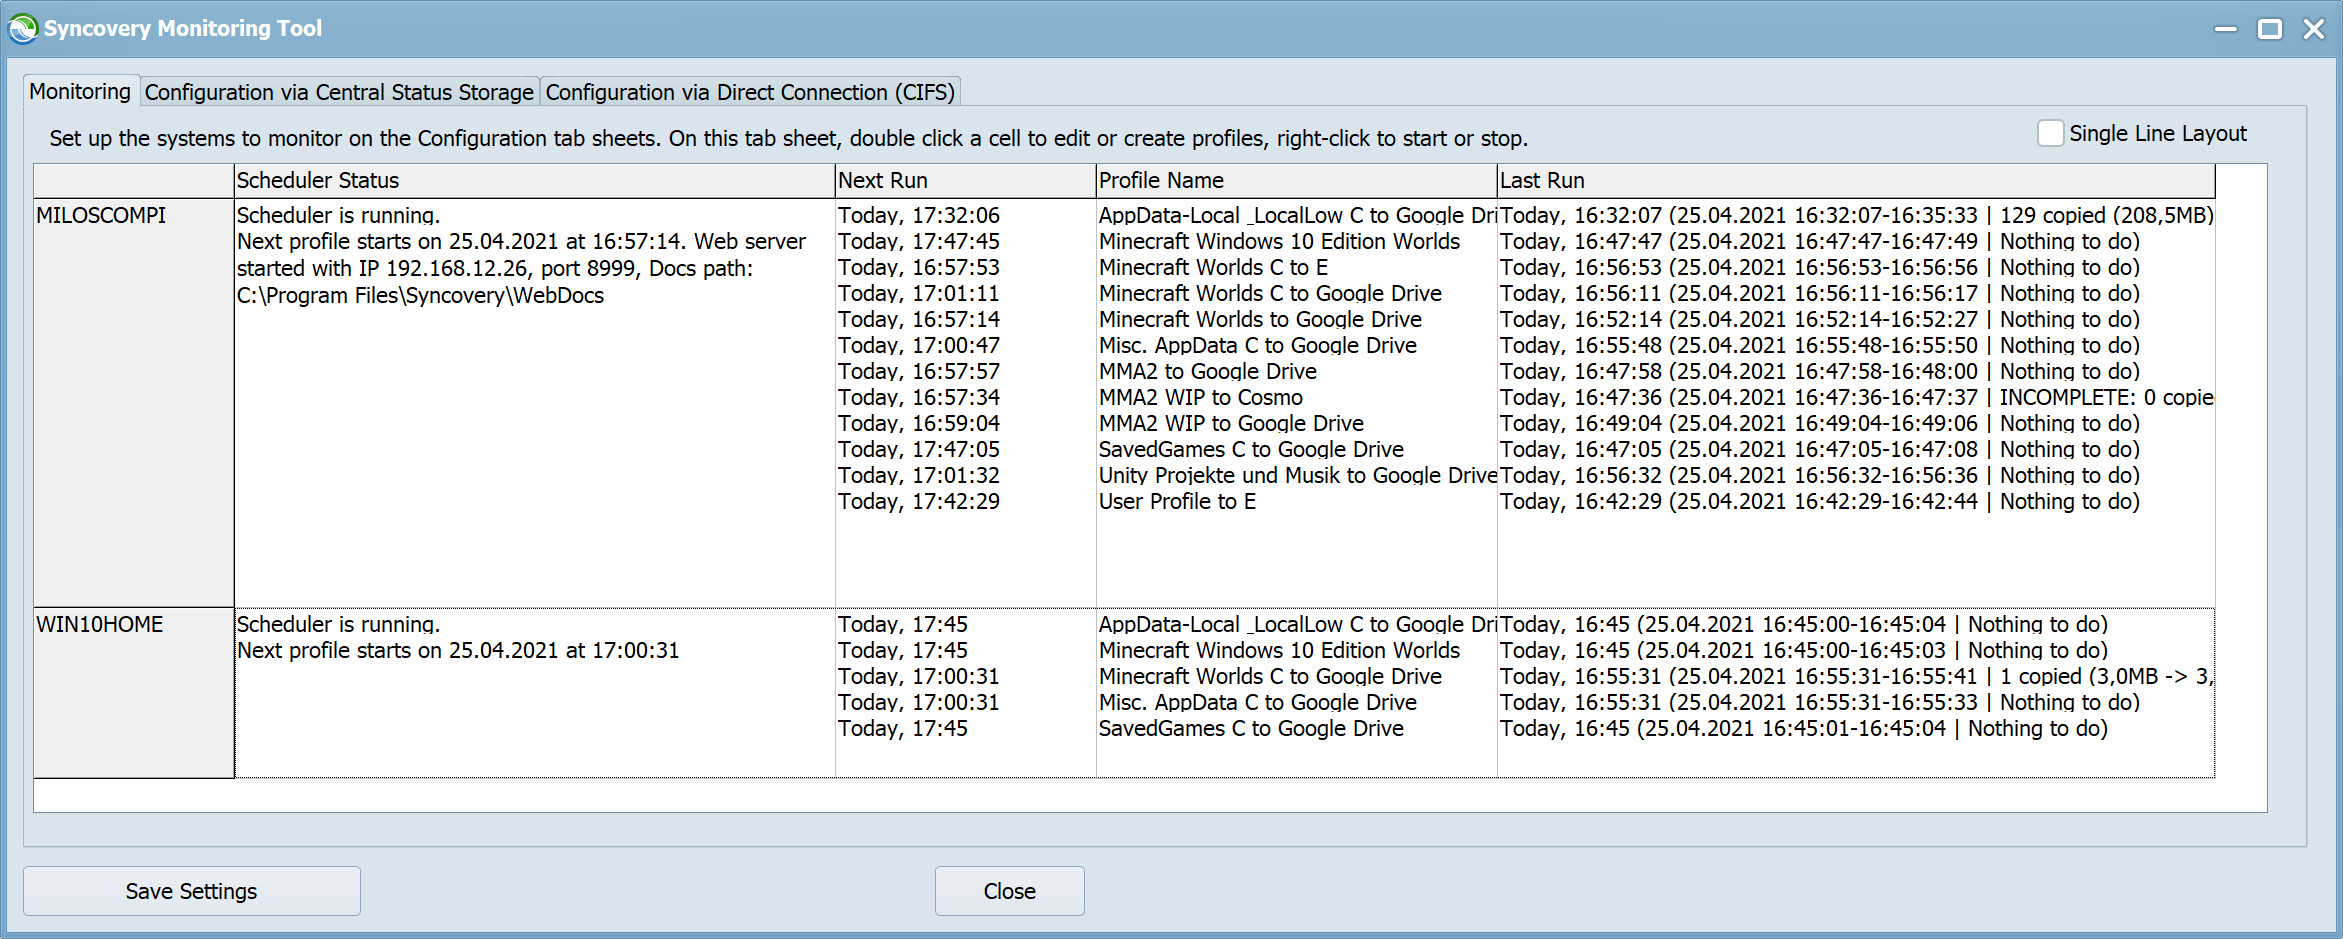
A context menu is available, allowing you to perform various administrative tasks, such as starting or stopping the schedule, and editing profiles. If editing profiles does not work, please check that “Remote Profile Editing” is allowed on the other machine, as shown in a previous screenshot, and that the password matches your configuration.
Setting Up Mode 2 (Exchange Information via Central Status Storage)
Setting up the monitoring via central status storage is more complex. It is done mainly on the tab sheet shown in the screenshot below, but also involves editing Syncovery.ini directly on the clients to be monitored. You will find detailed steps and explanations below the screenshots.
The main requirement is that you need a folder on a server or some cloud storage that can be used. In this example, we will use SFTP to access monitoring.syncovery.com with user name admin and password xyz (these credentials are just an example and do not work in real life).
Two separate SFTP folders are actually used:
a) one for status files that the clients send to the monitoring tool, and
b) another one for command files that the monitoring tool sends to the clients. These commands can include starting or stopping the scheduler, editing profiles etc.
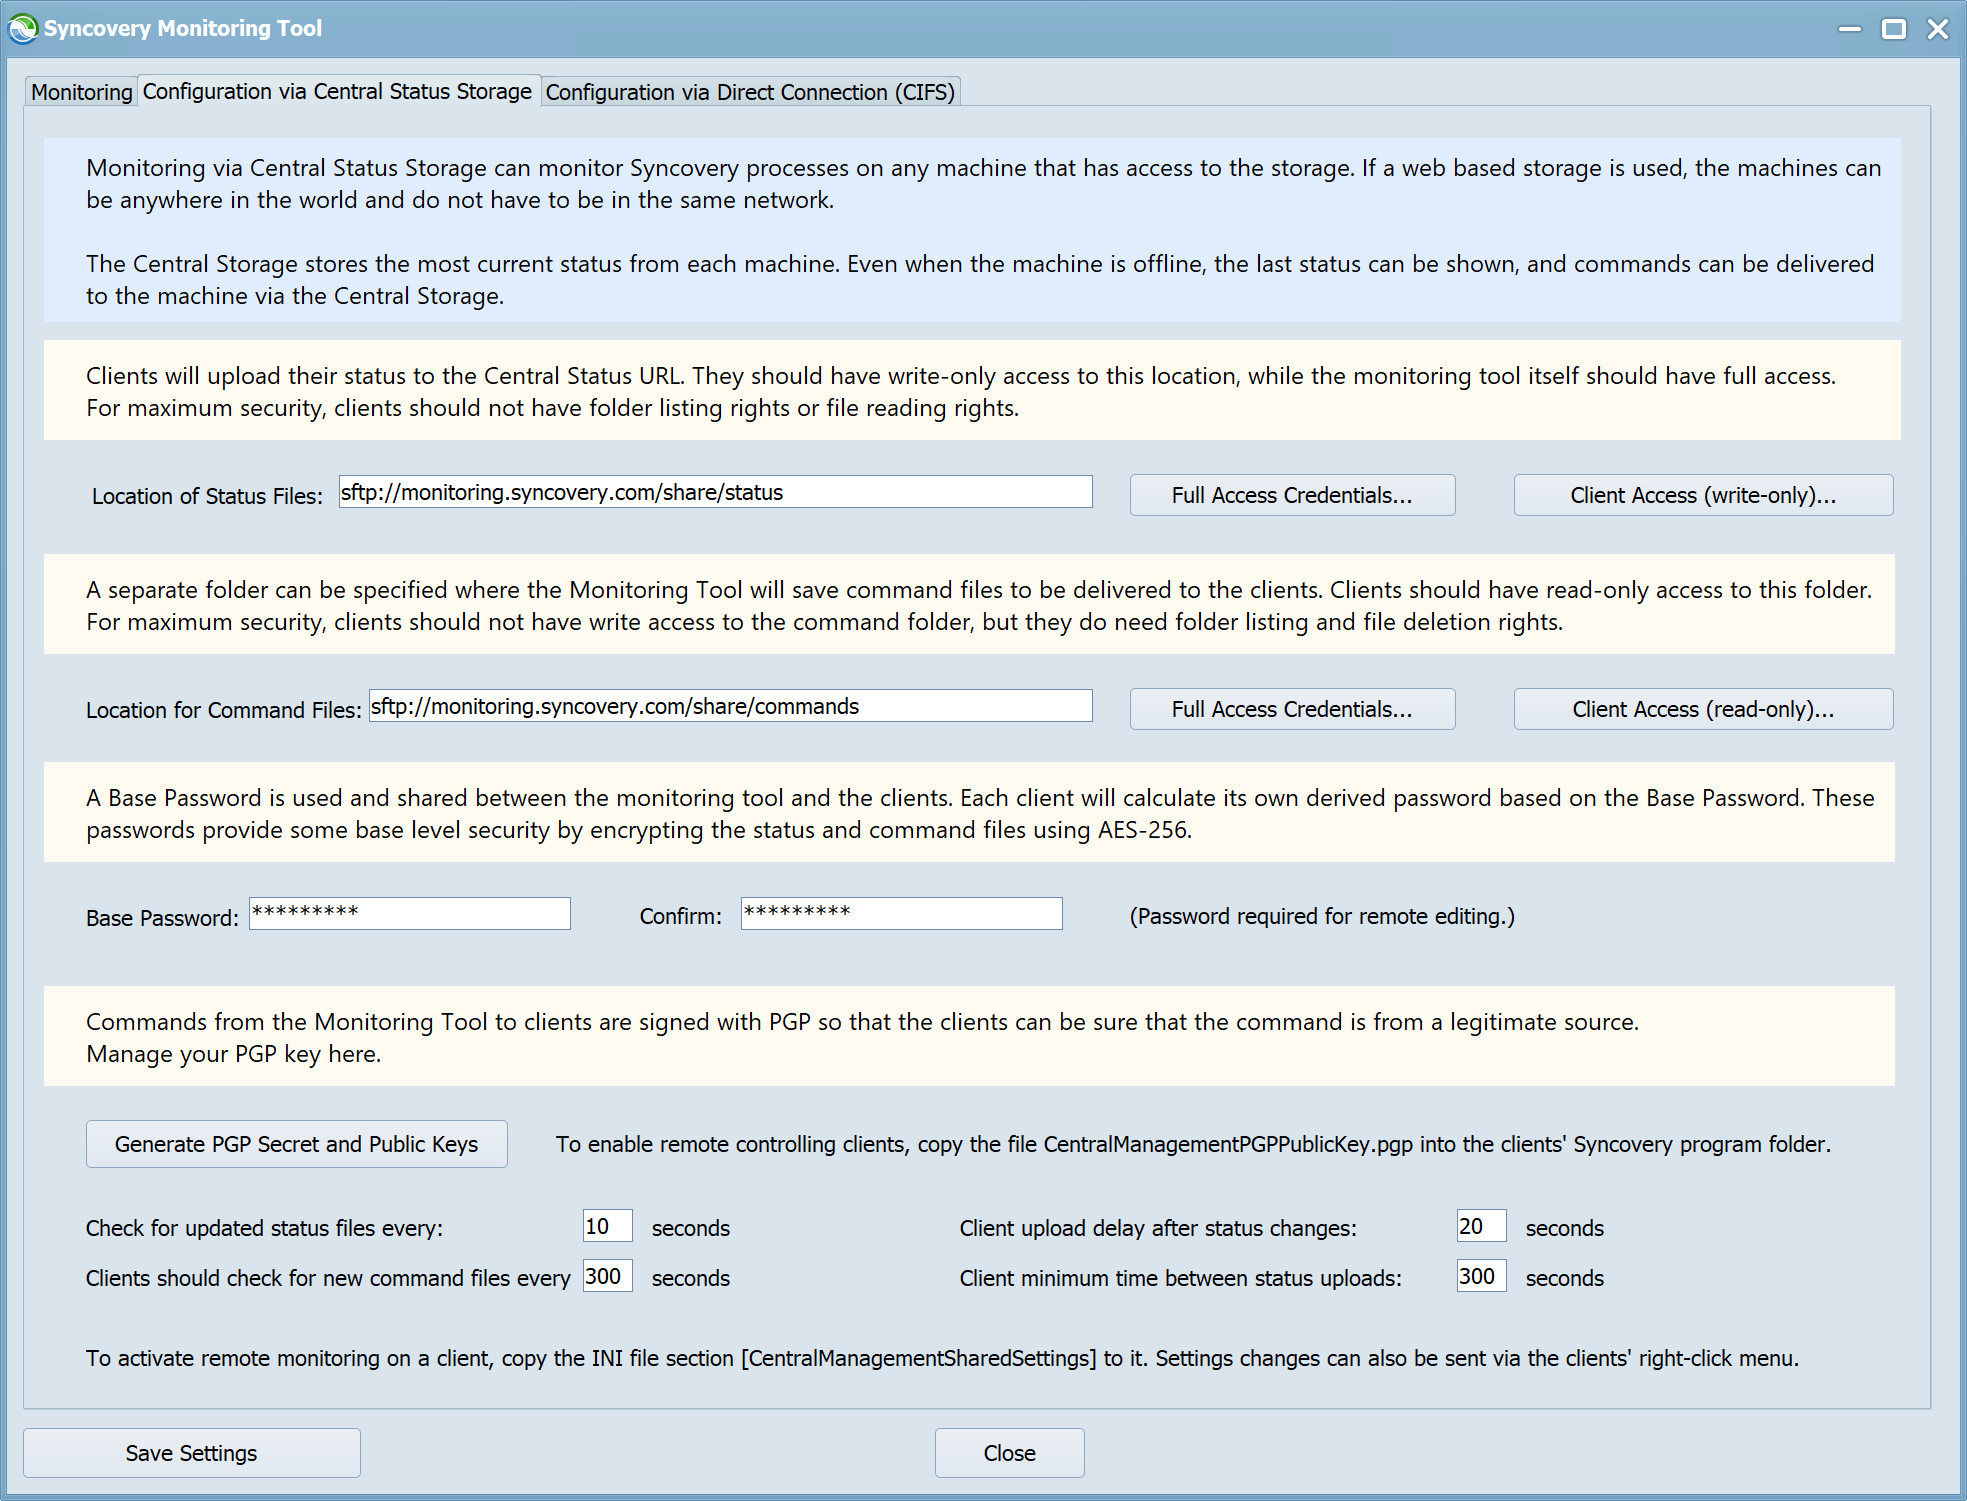
Step 1: Specify Location for Status Files
In the first step, we will specify the SFTP location for status files. Clients will upload their status and progress information as small files to this folder. Each client uses a unique file name, so that the files of many clients can all exist in the same folder. You need to click the “Full Access Credentials…” button to specify the Internet Protocol, and user name and password. You can optionally specify a separate user for the clients with write-only access, but this is only necessary if you want to implement the highest possible security standard.

Step 2: Specify Location for Command Files
To be able to send commands to clients, you need to specify a separate folder for command files. The Monitoring Tool will upload commands to this folder when you want to start or stop the scheduler, edit or manually run profiles, update Syncovery etc. Again you need to click the “Full Access Credentials…” button to specify credentials. You can optionally specify a separate user for the clients, who need read-only and delete access (they have to be able to delete command files after executing them).

Step 3: Specify a Base Password
A base password is needed to encrypt the communication. Each client will actually derive its own password from the base password, so that clients cannot see each others’ statuses. But all can communicate with the monitoring console.

Step 4: Set up PGP to make command files trustworthy
To ensure authenticity of the commands that you send to clients, they are encrypted and signed with a PGP secret key. Please click the button Generate PGP Secret and Public Keys and follow the Wizard steps to generate your keys.

At the end of the key generation, a message box will inform you about the location of the generated files. They are usually similar to these:
C:\Program Files\Syncovery\CentralManagementPGPPublicKey.pgp
C:\Users\Tobias\AppData\Roaming\CentralManagementPGPPrivateKey.secret
The secret key, along with its password, will give you the power to send commands to clients. Because there can be only one, you may need to share it with other administrators who need this capability. The secret key is not shared with client installations.
The public key however needs to be copied to clients, so they can verify the authenticity of incoming commands. So you need to copy the file CentralManagementPGPPublicKey.pgp to C:\Program Files\Syncovery on all client computers that you wish to control.
Step 5: Additional Settings
The additional settings allow you to fine-tune how frequently the clients (and the monitoring tool) will connect with your status storage server. Depending on the number of clients, you can allow smaller or larger intervals. If the intervals are larger, it will take longer for status information to update, or for commands to be processed.

Step 6: Copy Configuration to Clients
Before copying the configuration to clients, please click on all the four credentials buttons once more and verify the settings. Ensure that all folders are absolute paths that start with a slash on the four dialogs.
Your Syncovery.ini file (usually in C:\ProgramData\Syncovery) will now contain two new sections related to monitoring. These lines contain all of the above settings.

Please save only the [CentralManagementSharedSettings] to a text file and add this section to every client’s Syncovery.ini if you want its status to appear in your Monitoring Tool. In addition, remember to copy the file CentralManagementPGPPublicKey.pgp to C:\Program Files\Syncovery on all client computers that you wish to control, as mentioned in Step 4. The Syncovery scheduler or service should be completely stopped when making these changes, and then restarted.
Step 7: Check Functionality and Troubleshooting
After setting this up, and restarting the scheduler on the client machine, you should begin to see client information on the Monitoring tab sheet relatively quickly.

If you don’t see such information, it’s usually because of the Internet/FTP settings. The client might not have been given the correct credentials or the correct URL. Check if files like this appear on the status storage:
WINSVR2016VM.{1B6D0D72-3285-4D5D-8AD7-B38041BF0F77}.syncoverystatus
Sometimes you need to be patient for a status to arrive. You can probably change the additional settings and especially reduce the “client minimum time between status uploads”.
If there are still issues, you can have Syncovery create log files for the status file transfers by adding this line to the [CentralManagementSharedSettings]
section of Syncovery.ini:
LogMonitoringTransfers=1
Step 8: Try Sending Commands to Clients
You can use the context menu to send various commands to the client. The menu is similar to the screenshot near the top of this page. You can start/stop the scheduler, edit or create profiles, as well as update Syncovery. Because the
process of transmitting the commands can take a few minutes, you will see the processing state in the grid, such as:
*** Command Uploaded ***
*** Command Downloaded ***
*** Command Processed ***
Step 9: Activate Monitoring for Linux and Mac Clients
On Linux machines, you can import the CentralManagementSharedSettings by saving the relevant Syncovery.ini section to a separate, small ini file and importing it via the Program Settings dialog, tab sheet “Startup” by clicking the button “Import Config Lines (INI Style)…“.
On macOS (since version 9.35a), there’s a button “Import Config Lines” on the Prefs tab sheet of the Program Settings dialog to import the configuration.
